
Side Dishes
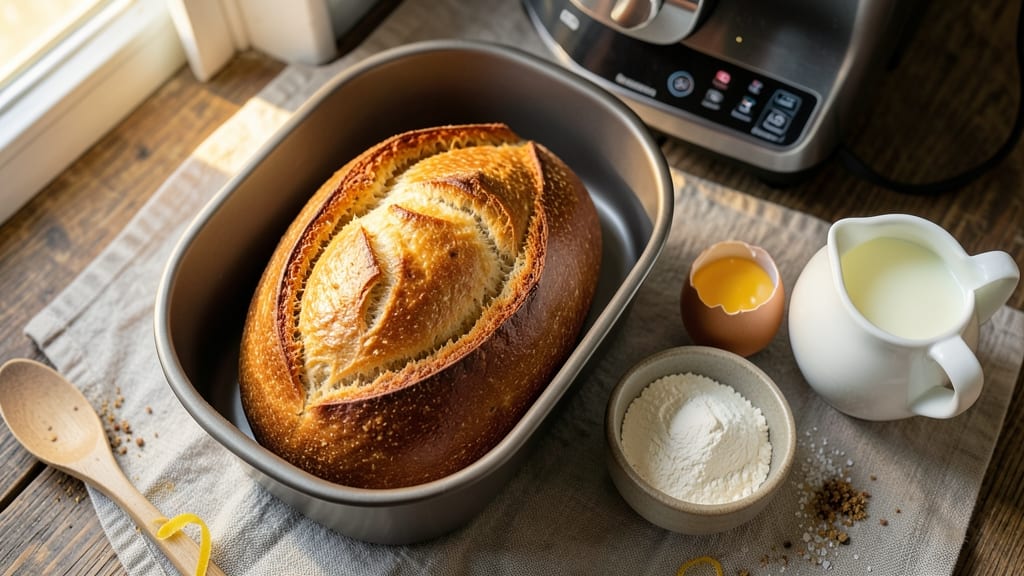
This all-purpose bread machine recipe delivers foolproof, golden loaves with a perfect rise every single time—no baking expertise required. The secret lies in precise ingredient ratios and understanding your machine's specific cycles, transforming simple pantry staples into restaurant-quality bread with minimal effort.
I've baked hundreds of loaves using this method, and it consistently produces bread with a crisp crust, airy crumb, and just the right chewiness for sandwiches or toast.
The beauty of this recipe is its versatility—use it for classic sandwich bread, soft dinner rolls, or even crusty artisan loaves by adjusting the cycle. We'll cover the exact measurements for flour, yeast, and water, plus how to handle optional add-ins like seeds or herbs without compromising texture.
The bread machine does all the hard work: kneading, rising, and baking—you just add ingredients and let it work its magic.
What makes this recipe truly perfect is the troubleshooting section that addresses common issues like dense bread or overproofing. With just 10 minutes of prep time and a 3-hour cycle, you'll have warm, fragrant bread ready to slice.
The result is bread that's light enough to hold fillings but sturdy enough for toast, with a flavor profile that's consistently delicious—no more store-bought disappointment.
Whether you're a beginner or seasoned baker, this method guarantees restaurant-quality results at home. The key is paying attention to dough consistency and selecting the right cycle for your desired texture. Let's get started on creating your perfect loaf—your kitchen will never smell the same again.
Ingredients for all purpose bread machine
Transform these simple pantry staples into golden, restaurant-quality loaves with zero stress.
| Ingredient | Amount | Notes |
|---|---|---|
| All-Purpose Flour 🌾 | 3 ½ cups | Unbleached preferred for better texture |
| Active Dry Yeast 🍞 | 2 ¼ tsp | Ensure yeast is fresh and active |
| Granulated Sugar 🍚 | ¼ cup | Enhances yeast activation |
| Salt 🧂 | 1 ½ tsp | Diamond Crystal preferred |
| Whole Milk 🥛 | ¾ cup | Full-fat for optimal dough elasticity |
| Large Egg 🥚 | 1 whole | Room temperature for even mixing |
| Unsalted Butter 🧈 | 2 tbsp | Softened for smooth incorporation |
| Extra-Virgin Olive Oil 🫒 | 1 tbsp | Adds richness and tenderness |
| Sesame Seeds 🌻 | 1 tbsp | Optional for topping (optional) |
The flour is where the magic happens—King Arthur or Bob's Red Mill are my go-tos for consistent results. Check your yeast freshness by dropping it in warm water with sugar; if it bubbles within 5 minutes, it's good to go. For the milk, whole is non-negotiable—it creates the perfect chewiness. I always grab organic whole milk from Whole Foods or Trader Joe's for the best flavor. The butter should be soft but not melted—press a finger into it to test. If you're feeling fancy, swap the sesame seeds for poppy or everything bagel seasoning for extra flavor.
No whole milk? Unsweetened almond milk works in a pinch, but the texture will be slightly less tender. Running low on yeast? Instant yeast is a 1:1 swap, but make sure to dissolve it in the warm water first. Short on butter? Extra olive oil (1 tbsp more) keeps things moist—just don’t overdo it or the bread gets greasy. The egg is crucial for structure, but if you're avoiding it, 1 tbsp ground flaxseed mixed with 3 tbsp water works as a binder. For a crustier loaf, reduce the olive oil by 1 tbsp and add 1 tsp water. And if your machine has a crust setting, use it—it’s a game-changer for that perfect golden-brown finish.
Store your bread in a bread box or paper bag to keep it fresh for 3-4 days—plastic bags make it stale faster. For longer storage, freeze slices wrapped in foil for up to 3 months. Pro tip: Toast frozen slices directly from the freezer for crispy, fresh-tasting bread. If you make extras, share them—this recipe always yields more than you think. And if your dough looks too sticky? Add 1 tbsp more flour during the kneading cycle. The bread machine handles the rest, but these little tweaks ensure restaurant-quality results every single time.
Why You'll Love This Recipe
- Bread Machine Magic: The moment I dump in the flour, yeast, and warm milk, my machine does all the heavy lifting—no kneading, no fuss. Just set it and forget it while you sip coffee or binge your favorite show.
- Golden Crust Promise: That touch of sugar in the dough gives it a perfect caramelized crust while keeping the inside soft and pillowy. Honestly, it’s the kind of bread that makes you pause mid-slice just to admire it.
- Everyday Hero: Whether it’s toast for breakfast, sandwiches at lunch, or dinner rolls for a weeknight pasta, this bread handles it all. I even freeze slices for quick toast—no sad, stale leftovers here.
- Budget-Friendly Staple: Five simple ingredients, one loaf that stretches across meals. The milk adds richness without breaking the bank, and a single batch feeds my family for days. My wallet and I both approve.
Step-by-step instructions for hands-off bread machine loaves
Your bread machine will do all the hard work—just follow these precise steps.
Prepare Ingredients for Optimal Mixing
First, let the whole milk and large egg come to room temperature—cold liquids slow yeast activation. In a small bowl, dissolve the 2.25 tsp active dry yeast in ¼ cup warm water (about 110°F) for 5 minutes until frothy. This ensures your yeast is active and ready to work.
In a separate bowl, whisk together the 3.5 cups all-purpose flour, 0.25 cup granulated sugar, and 1.5 tsp salt. Sift the flour once to aerate it—this creates a lighter crumb. Softened 2 tbsp unsalted butter and 1 tbsp extra-virgin olive oil should be ready in a small dish for easy addition.
Add Components to Bread Machine Pan
Place the yeast mixture in the bottom of your bread machine pan. Add the flour mixture, then pour in the room-temperature whole milk and large egg. The dough will look shaggy at first—that's normal. Scrape down the sides to ensure even mixing.
Add the softened butter and olive oil to the center of the pan. These fats create a tender crumb and prevent a dry texture. If using, sprinkle the 1 tbsp sesame seeds on top for a decorative finish—they'll stick to the dough during kneading.
Select Settings for Perfect Rise
Choose the "Basic White Bread" setting on your machine. The cycle typically takes 3 to 3.5 hours, including kneading, first rise, shaping, and baking. The machine will automatically knead the dough for 5 to 10 minutes—you'll see it transform from shaggy to smooth and elastic.
Listen for the kneading phase: the machine will make a steady humming sound. When the dough becomes glossy and springs back when poked, it's ready for the first rise. The machine handles all temperature control—no need to adjust heat settings.
Monitor for Golden Perfection
Your bread will bake until it reaches an internal temperature of 190°F and develops a deep golden-brown crust. The machine will automatically switch to "Keep Warm" mode when done. Tap the bottom—the sound should be hollow, not dull, indicating a perfect rise.
Remove the loaf immediately to prevent over-softening. Let it cool on a wire rack for at least 30 minutes before slicing. The crust will firm up as it cools, and the crumb will develop its signature texture. Slice while still slightly warm for the best eating experience.
Pro Tips For Making All Purpose Bread Machine
- Warm the Milk First: I learned this the hard way—adding cold milk to yeast makes it sluggish and delays rising. Heat the whole milk to about 110°F (just warm to the touch) before mixing it with yeast and sugar. The yeast will activate faster, and your dough will start kneading like a champ in no time.
- Skip the Pre-Measurement Guesswork: Weigh your flour instead of scooping. A standard recipe calls for 3–4 cups, but scooping varies wildly—your bread could end up dense or gummy. Use a kitchen scale for 400–450 grams (about 3 ½ cups) of all-purpose flour. Your bread will have consistent texture every time.
- Add Salt to the Dough, Not the Yeast: I used to toss salt with the yeast packet, thinking it didn’t matter. Wrong. Salt kills yeast, so mix it after the yeast and sugar have had a chance to bloom in the warm milk. Sprinkle it directly into the flour or add it during the first kneading cycle—your bread’s rise will thank you.
- Run the Machine Longer: Most recipes stop at 3–4 hours, but let it go for 5–6 if your kitchen is chilly. Cold air slows fermentation, and underproofed dough means a dense loaf. Check the dough at 3 hours—if it’s not springy and doubled, let it run another hour. Patience here makes all the difference.
Pro cooking tips for this dish
Cycle Selection Mastery
Your bread machine’s cycle choice makes all the difference. For a classic sandwich loaf, use the "Basic White Bread" setting—it balances rise time and texture perfectly. Need something softer, like dinner rolls? Try the "Dinner Rolls" cycle, which creates a lighter crumb.
For crustier artisan bread, select "Crust" or "French" settings if available. My Panasonic bread machine has a "Whole Wheat" option that works well for seed-enhanced loaves—just reduce water by 1 tablespoon to prevent a gummy texture. 🌾
Dough Consistency Secrets
If your dough looks too sticky during kneading, your machine might need 1 extra tablespoon of flour. Too dry? Add 1 teaspoon of water or 1 tablespoon of olive oil after the first kneading phase.
The ideal dough should be smooth, elastic, and slightly tacky—like Play-Doh but not gluey. Pro tip: Use a lightweight metal spatula to gently scrape dough off the sides during kneading for even mixing.
I’ve found that room-temperature ingredients (especially the milk and egg) prevent over-sticky dough from the start. ⏱️
Yeast Activation Test
Before starting, always test your yeast’s freshness. Mix 1 teaspoon of yeast with ¼ cup warm water (110°F) and 1 teaspoon sugar in a small bowl. If it bubbles vigorously within 5 minutes, your yeast is active. No bubbles? Your bread won’t rise—replace it immediately.
I keep a small jar of yeast in the fridge and use it within 3 months for best results. For high-altitude baking (above 3,500 feet), increase yeast by ½ teaspoon and reduce sugar by 1 tablespoon to compensate for slower fermentation. 💡
Butter vs. Oil Swap
Butter adds richness and flavor, while olive oil keeps bread moist and tender. Need a substitution? Replace 2 tablespoons butter with 2 tablespoons olive oil—just reduce the total fat by 1 tablespoon if your recipe feels too heavy.
For extra flavor, try 1 tablespoon melted garlic butter or 1 teaspoon honey mixed into the dough. I’ve also had success with 1 tablespoon sour cream for a slightly tangy twist. Always soften butter properly: press a finger into it—if it leaves a slight indent, it’s ready. 🧈
Add-Ins Without Ruining Texture
Seeds, nuts, or dried fruit? Add them after the first kneading phase to avoid overworking the dough.
For herbs like rosemary or thyme, finely chop and mix into the flour before adding liquids. Cheese lovers, try ¼ cup shredded cheddar—it melts slightly during baking for a savory kick.
Pro move: Toast seeds or nuts in a dry pan for 2 minutes before adding to enhance flavor. Avoid adding more than ½ cup total add-ins or your bread may become dense. 🌻
Crust Control Tricks
Want a crispier crust? Brush the baked loaf with 1 tablespoon melted butter while still warm. For a softer crust, tent loosely with foil during the last 10 minutes of baking. My Kitchenaid bread machine has a "Crust Setting"—use it for that golden, bakery-style finish.
If your crust turns too pale, increase the bake time by 5 minutes or use the "Crust" setting. For extra shine, spray the loaf with water before baking—it creates a glossy finish. ✨
Nutrition facts
Frequently asked questions
What if my bread machine doesn't have a "Basic White Bread" setting?
Use the "White Bread" or "Standard" setting instead—most machines have similar cycles. For a softer texture, try the "Dinner Rolls" setting. If your machine lacks these, select the longest basic cycle (usually 3 hours) for optimal rise and texture. Always check your manual for specific options.
Can I make this recipe without a bread machine?
Yes! Mix ingredients by hand, knead for 8-10 minutes until smooth, then let rise in a bowl for 1-2 hours until doubled. Shape into a loaf, place in a greased pan, and bake at 375°F for 25-30 minutes until golden. The texture will be slightly denser but still delicious.
Why did my bread turn out dense?
Dense bread usually means overproofing (dough rose too long) or dead yeast. Check if your yeast bubbled when tested—if not, replace it. Also ensure your machine's pan isn't overfilled (dough should fill ½ the pan). For extra insurance, reduce rise time by 15 minutes next time.
How can I make this recipe gluten-free?
Replace the all-purpose flour with a 1:1 gluten-free bread flour blend (like Bob's Red Mill) and add 1 tsp xanthan gum. Reduce water by 2 tbsp—gluten-free dough needs less liquid. Expect a slightly denser texture but still soft crumb. Always test yeast freshness first, as gluten-free dough rises differently.
Can I make this into rolls instead of a loaf?
Use the same recipe but divide dough into 12 equal balls after kneading. Place in a greased 9x13 pan, cover, and let rise for 30 minutes. Bake on "Dinner Rolls" setting (or 350°F for 15-18 minutes) until golden. Brush with melted butter while warm for extra flavor.