
Side Dishes
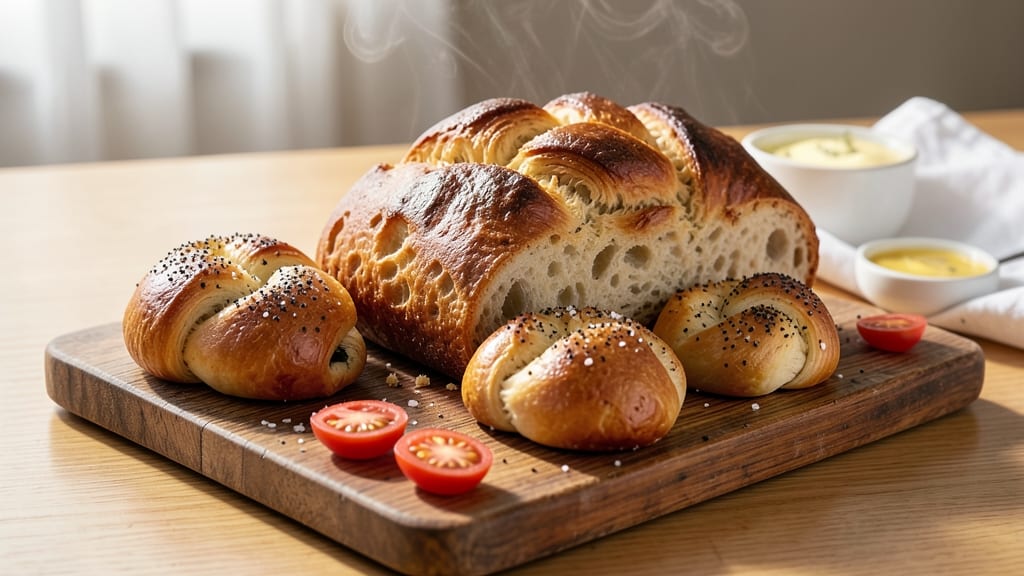
This appetizer bread recipe transforms ordinary bread into a crowd-pleasing centerpiece that disappears faster than you can say "pass the butter." 🔥 The secret lies in a simple yet versatile dough that adapts to any savory twist—whether you're craving crispy garlic knots, cheesy pull-apart loaves, or herbed flatbreads.
I've perfected this method over years of hosting gatherings, and it's become my go-to for turning bread into an appetizer that never fails to impress.
What makes this recipe stand out is its flexibility—you can shape the dough into individual rolls, a pull-apart loaf, or even flatbreads for dipping. The dough itself is straightforward, requiring just a few pantry staples and minimal effort, but the results are anything but basic.
A touch of olive oil and herbs elevates the flavor, while proofing the dough properly ensures a light, airy texture that's perfect for sharing.
The real magic happens in the oven, where the bread develops a golden, crispy exterior while staying soft and tender inside. Whether you're serving it warm with marinara for dipping or pairing it with charcuterie for a sophisticated spread, this appetizer bread delivers restaurant-quality results without the fuss.
It's the kind of dish that transforms a simple gathering into something memorable.
Best of all, this recipe scales effortlessly—double the batch for parties, or make a single loaf for a cozy night in. The possibilities are endless, and the feedback is always the same: "This is the best appetizer bread I've ever had!" Let's get started on creating your perfect bite-sized masterpiece.
Ingredients for appetizer bread
Pantry staples meet restaurant-quality flavor—this dough transforms into anything from garlic knots to herbed flatbreads.
| Ingredient | Amount | Notes |
|---|---|---|
| All-Purpose Flour 🌾 | 4 cups | Sifted for light texture |
| Active Dry Yeast 🍞 | 2 ¼ tsp | One packet or 0.25 oz |
| Granulated Sugar 🍬 | 1 tbsp | Feeds the yeast |
| Warm Water 💧 | 1 ¼ cups | 110°F (43°C) ideal |
| Unsalted Butter 🧈 | ½ cup | Softened, full-fat preferred |
| Large Eggs 🥚 | 1 whole | Room temperature |
| Extra-Virgin Olive Oil 🫒 | ¼ cup | For richness and flavor |
| Kosher Salt 🧂 | 1 ½ tsp | Diamond Crystal preferred |
| Fresh Garlic 🧄 | 3 cloves | Minced for aromatic punch |
| Fresh Rosemary 🌿 | 1 tbsp | Chopped, stems removed |
| Fresh Thyme 🌿 | 1 tbsp | Leaves only, chopped |
| Parmesan Cheese 🧀 | ½ cup | Freshly grated, optional |
| Sesame Seeds 🌰 | 1 tbsp | For topping, optional |
| Coarse Sea Salt 🧂 | 2 tbsp | For sprinkling, optional |
The yeast is the heart of this dough—King Arthur brand or Bob's Red Mill are my go-tos for reliable activation. Warm water is key: too hot kills the yeast, too cold slows it down. I always test the water temp with my finger—should feel warm but not hot to the touch. For the butter, Land O'Lakes or Plugrá are my favorites, but any full-fat butter works. Fresh herbs make all the difference—Whole Foods or your local market usually have the best selection. If you're short on time, dried herbs work at half the amount, but trust me on the fresh stuff for that restaurant-quality flavor.
No yeast? Instant yeast works 1:1—just skip the sugar. Eggs too expensive? Flax egg (1 tbsp ground flax + 3 tbsp water) replaces one egg, though texture will be slightly denser. Olive oil substitute? Avocado oil has a similar neutral flavor. For the garlic, jarred minced is fine in a pinch, but fresh is always better. Want to skip the Parmesan? Nutritional yeast gives a cheesy flavor without dairy. The sesame seeds can be swapped for poppy seeds or everything bagel seasoning for different vibes. And if you're making a big batch, double everything—this dough scales perfectly for parties.
Dough keeps for 3 days in the fridge, wrapped tightly in plastic. For longer storage, freeze shaped portions on a tray, then transfer to a bag for up to 3 months. Freshly baked bread reheats beautifully—5 minutes at 350°F brings back that crispy exterior. I always make extra and freeze it for lazy weeknights. The herbs lose potency after 2 days, so add them fresh right before baking. And if you're prepping ahead, proof the dough overnight in the fridge—it develops deeper flavor and makes morning baking a breeze.
Why You'll Love This Recipe
- No-Knead Magic: I swear, this dough comes together faster than my coffee brews. Just mix the flour, yeast, sugar, and warm water—no fancy techniques, no waiting forever. The butter gets worked in until it’s cool enough to handle, and boom: ready to shape in under 10 minutes.
- Buttery Crust, Soft Core: That warm butter melting into the dough? It’s what makes this bread ridiculously good. The crust gets just crisp enough to hold up to dips—think marinara, garlic aioli, or even a little honey—while the inside stays pillowy. Honestly, I’ve never met an appetizer bread that balances both so well.
- Game for Any Gathering: Need something for game day? A picnic? Or just a snack to tide you over while dinner simmers? This bread is my go-to because it’s easy to halve, shape into mini loaves, or even cut into thick slices for dipping. My friends always ask for the recipe—and they always bring it back for seconds.
- Leftovers That Don’t Let You Down: Between us, this bread actually tastes better the next day. The flavors meld, the texture improves, and it’s still perfect for toast or sandwiches. Plus, it’s cheap to make—just flour, yeast, sugar, and butter—and a single batch stretches across multiple meals without feeling like a chore. (Yes, even on a Tuesday night.)
Step-by-step instructions for savory appetizer bread
Here's how to transform simple dough into irresistible savory bites perfect for any gathering!
👨🍳 Step 1: Activate the Yeast and Mix the Dough
In a large bowl, combine the 1.25 cups warm water, 1 tbsp granulated sugar, and 2.25 tsp active dry yeast. Let it sit for 5-10 minutes until frothy—this means your yeast is alive and ready to work! If it doesn't bubble, your yeast might be dead, and you'll need to start over.
In a separate bowl, whisk together the 4 cups all-purpose flour and 1.5 tsp kosher salt. Create a well in the center and add the 0.5 cup softened butter, 1 whole egg, and 0.25 cup extra-virgin olive oil. Pour in the yeast mixture and mix with a wooden spoon until a shaggy dough forms. Here's the thing—don't overmix or you'll develop too much gluten and end up with tough bread.
🍳 Step 2: Knead Until Silky Smooth
Turn the dough onto a lightly floured surface and knead for 8-10 minutes until smooth and elastic. You'll know it's ready when it springs back slowly when poked. I like to use the "windowpane test"—stretch a small piece of dough thin enough to see light through it without tearing.
Real talk: This is where many people give up, but don't skip this step! Proper kneading develops the gluten structure that gives your bread that perfect chewy texture. If your dough feels too sticky, add just a little more flour—1 tablespoon at a time—but don't go overboard or you'll dry it out.
🔪 Step 3: Let the Dough Rise (The Magic Happens Here!)
Place the dough in a lightly greased bowl, cover it with a damp kitchen towel, and let it rise in a warm place for 1-2 hours or until doubled in size. I always put mine near the oven with the light on—it creates a perfect warm, humid environment. Don't rush this step; patience pays off with airy, flavorful bread.
Once doubled, punch down the dough to release any air bubbles. Divide it into 4 equal portions (about 8 ounces each) and shape them into balls. Arrange them on a parchment-lined baking sheet, cover again, and let them rise for another 30-45 minutes until puffy. This second rise gives you those beautiful, airy pockets we all love.
🔥 Step 4: Shape and Bake to Golden Perfection
Preheat your oven to 375°F. While it heats, shape each dough ball into a 1-inch thick round loaf. Make a deep dimple in the center of each with your thumb—this creates room for the dough to expand and gives you that gorgeous crackly top. Brush the tops with a little olive oil and sprinkle with 2 tbsp coarse sea salt and 1 tbsp sesame seeds for that irresistible crunch.
Bake for 20-25 minutes until the bread is deep golden brown and sounds hollow when tapped on the bottom. The edges should pull away from the pan easily. If it browns too quickly, tent with foil to prevent over-browning while it finishes cooking inside.
🥘 Step 5: Add Savory Toppings and Serve Warm
While still warm, brush the tops with melted butter and sprinkle with the 0.5 cup freshly grated parmesan cheese, 3 cloves minced garlic, 1 tbsp chopped fresh rosemary, and 1 tbsp chopped fresh thyme. The heat will make these aromatics sizzle and infuse the bread with incredible flavor.
Let the bread cool for 5-10 minutes before serving—this prevents the toppings from sliding off. Each warm, aromatic bite will have that perfect balance of crispy crust, soft interior, and savory herbaceous flavors. Perfect for parties, game day, or just when you need a little something special to start your meal!
Pro Tips For Making Appetizer Bread
- Bloom the Yeast First: Skip mixing yeast directly into flour—it’s a rookie move. Instead, dissolve it in warm water (105–110°F) with sugar first and wait 5–10 minutes until frothy. This guarantees your dough rises right the first time, not after your third attempt.
- Butter Matters More: That unsalted butter isn’t just for flavor—it’s the difference between dense bread and light, fluffy appetizer bites. Use it softened but cool (pressable but not melted) when mixing, or it’ll melt into a sticky mess mid-knead. (Yes, even if you’re impatient like me.)
- Don’t Over-Knead: I learned this the hard way—glazing my forearms with flour while aggressively kneading. This dough only needs 5–7 minutes by hand (or 3–4 on low speed in a mixer) until smooth. Overwork it, and you’ll end up with tough, chewy bites instead of tender, pull-apart perfection.
- Proof in a Warm Spot: Your kitchen counter isn’t always warm enough. Place the dough in a slightly turned-off oven (with the light on) or a microwave with a cup of hot water nearby. This cuts proofing time in half and ensures even rising—no lopsided loaves or sad, flat appetizer shapes.
Dietary considerations for appetizer bread
Gluten-Free Adaptations
For a gluten-free version, swap the all-purpose flour for a 1:1 gluten-free baking flour blend like King Arthur Measure for Measure or Bob's Red Mill 1-to-1. Add 1 tsp xanthan gum to improve elasticity—this dough will be stickier, so work quickly.
I’ve tested this with cup-for-cup substitution and found the texture stays light when proofed properly. 🌾
Dairy-Free Options
Skip the butter and Parmesan cheese—replace with olive oil (add 2 tbsp extra) and nutritional yeast (use ¼ cup) for a cheesy flavor. The egg can be swapped for a flax egg (1 tbsp ground flax + 3 tbsp water).
This keeps the dough rich and flavorful without dairy. Trust me, your guests won’t miss it!
Vegan-Friendly Swaps
For a fully vegan version, use vegan butter (like Miyoko’s) and flax eggs (as above). Replace the honey (if used) with maple syrup, and ensure your yeast is vegan-certified. The dough stays just as tender—just knead it a minute longer to help with binding. 🌱
Lower-Carb Versions
Cut carbs by replacing 2 cups of flour with almond flour (finely ground) and adding 1 extra egg for moisture. The texture will be denser but still delicious.
For extra flavor, add 1 tsp garlic powder and ½ tsp onion powder to the dough. This works best for individual rolls rather than a pull-apart loaf.
Allergen-Free Tips
If nut allergies are a concern, stick to the original flour blend—almond flour is a common allergen. For sesame-free, omit the seeds and use poppy seeds or everything bagel seasoning instead. Always double-check labels on yeast and spices, as cross-contamination can happen. Safety first!
Kid-Friendly Adjustments
Make it fun for kids by shaping the dough into animals or fun shapes instead of rolls. Skip the garlic and rosemary—kids love everything bagel seasoning or a sprinkle of cheese on top.
Let them help with the final sprinkle of toppings; it’s a great way to get them excited about baking! 🧒
Nutrition facts
Frequently asked questions
Can I make this appetizer bread ahead of time?
Shape the dough into rolls or loaves and refrigerate them overnight for enhanced flavor. The next morning, let them rise at room temperature for 1-2 hours before baking as directed. For longer storage, freeze shaped dough portions on a tray, then transfer to a bag for up to 3 months. Thaw in the fridge overnight before baking.
What's the best way to reheat leftover appetizer bread?
For crispy results, wrap cooled bread in foil and reheat at 350°F for 5-7 minutes. For a quick fix, pop slices in a toaster or air fryer at 375°F for 2-3 minutes. Avoid microwaving—it makes bread soggy. The key is restoring that golden crust while keeping the interior tender.
How do I adjust this recipe for a pull-apart bread appetizer?
Shape the dough into a single large loaf in a greased 9x13-inch pan. Make deep cuts with a sharp knife before baking. For extra flair, weave cheese sticks through the cuts before baking. Bake at 375°F for 25-30 minutes until golden. The pull-apart texture comes from the generous proofing time and proper knife cuts.
Why did my dough not rise properly?
Common culprits: yeast was old/dead (test with warm water + sugar—it should bubble in 5-10 minutes), water was too hot (>120°F kills yeast), or the environment was too cold. Keep dough in a warm spot (like near a turned-off oven with light on). If using instant yeast, skip the sugar and proofing time.
Can I make individual garlic knots instead of rolls?
Yes! Divide the dough into 12 small balls (about 2 ounces each). Shape into knots by crossing two fingers through the center and pulling gently. Arrange on a baking sheet and rise for 30 minutes. Bake at 375°F for 12-15 minutes. Brush with garlic butter after baking for extra flavor!