
Side Dishes
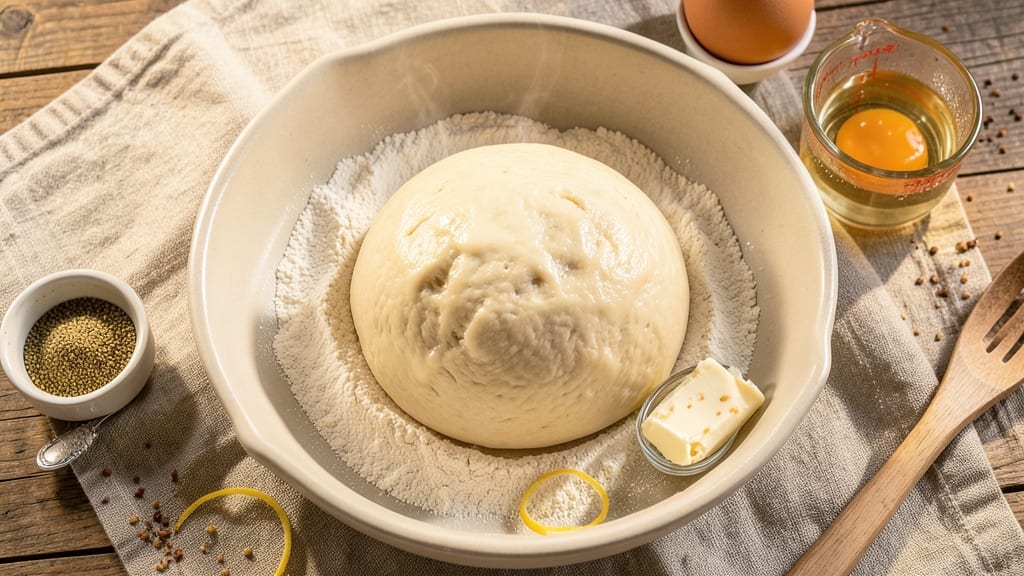
This active dry yeast bread roll recipe delivers the kind of pillowy softness that makes every bite worth the wait. The secret lies in proper kneading, precise proofing times, and oven control—techniques that transform basic ingredients into rolls with a tender crumb and golden crust.
I’ve perfected this method after years of trial and error, ensuring your rolls stay fresh and fluffy even after baking.
What sets these bread rolls apart is their foolproof process: a simple dough that rises twice for maximum airiness, shaped into perfect rounds, and baked until just golden. No special equipment is needed—just patience and attention to detail during proofing.
The result? Rolls that are light enough to melt in your mouth yet sturdy enough to hold fillings or toppings without falling apart.
Once out of the oven, these rolls stay warm and soft for hours, making them ideal for dinner tables, sandwiches, or serving alongside soups and stews. The 30-minute active time (plus proofing) means you can have fresh bread ready when you need it, without sacrificing quality.
Whether you’re a beginner or a seasoned baker, this recipe delivers restaurant-worthy results every time.
For extra flavor, brush the warm rolls with melted butter or a touch of honey—though they’re delicious plain. The key to success? Don’t rush the proofing, and bake at the right temperature to avoid a dense texture.
Let’s get started on creating rolls that will have everyone asking for seconds.
Ingredients for active dry yeast bread roll
Twelve simple ingredients transform into twelve perfect, pillowy bread rolls.
| Ingredient | Amount | Notes |
|---|---|---|
| Active Dry Yeast 🍞 | 2 ¼ tsp | Ensure yeast is fresh and not expired |
| All-Purpose Flour 🌾 | 5 cups | Plus 1 cup for dusting and shaping |
| Granulated Sugar 🍚 | 1 tbsp | Helps activate yeast |
| Unsalted Butter 🧈 | ½ cup | Cold, cut into small cubes |
| Large Eggs 🥚 | 1 whole | Room temperature for best mixing |
| Warm Water 💧 | 1 ¼ cups | 110°F to activate yeast properly |
| Salt 🧂 | 1 tsp | Diamond Crystal kosher preferred |
| Milk 🥛 | ¼ cup | Warmed for tender dough |
| Vegetable Oil 🫒 | 1 tbsp | For greasing bowl and pan |
| Cornmeal 🌽 | ¼ cup | For dusting baking sheet |
| Honey or Melted Butter 🍯 | 2 tbsp | Optional for brushing tops |
The yeast is the heart of these rolls—Bob’s Red Mill or Saf-Instant work best for reliability. If your kitchen runs warm, use 1 teaspoon less yeast to prevent overproofing. Flour matters too: King Arthur or Gold Medal give that tender crumb. For the butter, Land O’Lakes unsalted is my go-to—it stays cold longer during kneading. The warm water should feel like bathwater (110°F)—too hot kills the yeast, too cold makes it sluggish. I always double-check with a thermometer when I’m nervous about the temperature.
No yeast? Sourdough starter at 1/4 cup works in a pinch, but proofing times double. Short on butter? Vegetable shortening at the same amount keeps the rolls tender. The milk can be swapped for warm water plus 1 teaspoon melted butter if you’re avoiding dairy. For shaping, wet your hands slightly to prevent sticking—this is where most home bakers struggle. The rolls should be smooth, not lumpy. If your dough feels too sticky after kneading, add 1 tablespoon more flour, but don’t overdo it or they’ll turn dense.
Fresh yeast lasts 3 months in the fridge, sealed airtight. Flour keeps 6-12 months in a cool pantry, but once opened, use within 3 months for best rise. Shape the rolls and proof them in the fridge overnight for flavor development—they’ll be even softer the next day. For storage, cool completely, then wrap tightly in plastic. Reheat in a 350°F oven for 5-10 minutes to restore freshness. Freeze shaped rolls (unproofed) for up to 3 months—bake straight from frozen, adding 5-10 minutes to the time.
Why You'll Love This Recipe
- No-Fuss Dough: I swear by this—just mix, knead once (no fancy punches), and let the yeast do the work. That warm, buttery aroma rising from the bowl? It’s basically instant gratification.
- Golden Crust Promise: The sugar caramelizes on those rolls like magic, giving you that perfect crispy shell with a pillowy inside. Honestly, it’s the kind of texture that makes you close your eyes and sigh.
- Weeknight Superstar: Freeze half the batch for lazy mornings or pop them in the oven alongside dinner. They’re my secret weapon for feeding a crowd without stress—no one ever guesses they’re this easy.
- Budget Win: All-purpose flour, butter, and eggs? This recipe costs me pennies per roll, yet feels like a bakery treat. Between us, it’s the kind of deal that makes me want to hug my grocery receipt.
Step-by-step instructions for active dry yeast bread rolls
Here's how to create tender, golden rolls with perfect rise and texture—no shortcuts, just foolproof technique.
Activate the Yeast for Maximum Rise
In a large bowl, whisk together the 1.25 cups warm water (test temperature with your finger—it should feel like bathwater, around 110°F), 1 tablespoon granulated sugar, and 2.25 teaspoons active dry yeast. Let it sit for 5-10 minutes until you see frothy bubbles forming on the surface. This confirms your yeast is alive and ready to work.
If no bubbles appear after 10 minutes, your yeast may be dead—start over with fresh yeast. The sugar helps activate the yeast quickly, while the warm water creates the perfect environment for fermentation. Don't skip this step; proper yeast activation ensures your rolls will rise beautifully.
Mix and Knead the Dough to Develop Gluten
Add the 5 cups all-purpose flour, 1 teaspoon salt, and the 1 whole large egg to the yeast mixture. Stir with a wooden spoon until a shaggy dough forms, then turn it out onto a lightly floured surface. Knead for 8-10 minutes by hand, pressing down and folding the dough until it becomes smooth and elastic. The dough should spring back slowly when pressed.
If the dough feels too sticky, add 1 tablespoon vegetable oil to help bind it. Kneading develops gluten, which gives your rolls their structure and chew. For best results, use a dough scraper to keep everything contained—this prevents a mess and ensures even kneading.
Let the Dough Rise Until Doubled in Size
Lightly grease a large bowl with 1 tablespoon vegetable oil, place the dough inside, and cover with a damp kitchen towel. Let it rise in a warm place (like a turned-off oven with the light on) for 1-1.5 hours, or until the dough has doubled in size. You'll know it's ready when you poke it gently and the indentation stays put.
Overproofing is a common mistake—don't let the dough rise beyond double or your rolls will collapse. If your kitchen is cold, place the bowl near a heat source to maintain a consistent 75-80°F environment. This slow, controlled rise ensures even flavor development and perfect texture.
Shape and Proof the Rolls for Pillowy Softness
Punch down the risen dough to release air, then divide it into 12 equal pieces (about 2 ounces each). Roll each piece into a smooth ball, tucking the seams underneath for a neat finish. Place the rolls on a baking sheet dusted with 0.25 cup cornmeal, spacing them 1 inch apart to allow room to rise.
Cover the rolls loosely with the damp towel and let them proof again for 30-45 minutes until they've puffed up noticeably. The cornmeal prevents sticking and adds a subtle crunch to the bottom. For extra shine, brush the tops with 2 tablespoons melted butter or honey before baking—this creates a golden, crackly crust.
Bake Until Golden Brown and Hollow-Sounding
Preheat your oven to 375°F while the rolls proof. Bake for 15-18 minutes until the tops are golden brown and the rolls sound hollow when tapped on the bottom. Rotate the pan halfway through baking for even browning.
Resist the urge to open the oven door early—this causes the rolls to collapse. For best results, bake them until they're deeply golden and smell like fresh-baked bread. Let them cool on a wire rack for 5 minutes before serving to allow the steam to escape and the crust to set properly.
Pro Tips For Making Active Dry Yeast Bread Roll
- Bloom the Yeast First: I learned this the hard way—skipping the proofing step in warm water with a pinch of sugar leads to weak rolls. Dissolve the yeast in ¼ cup warm water (105–110°F) with 1 tsp sugar for 5–10 minutes until frothy before mixing into the dough. This guarantees your rolls rise properly instead of flopping like sad pancakes.
- Use Cold Butter: That butter should stay cold when cutting it into the dough—no melting into a greasy mess. Cut it into small cubes and toss them into the flour first, then mix in the wet ingredients. The cold butter creates flaky layers, and your rolls will have that buttery, tender bite instead of turning into dense flour balls.
- Don’t Over-Knead: After 5–6 minutes of mixing, the dough should be sticky but pull away from the bowl. Overwork it, and you’ll end up with tough, chewy rolls. Test by poking the dough—if it springs back slowly, it’s ready. Resist the urge to keep punching it like you’re mad at the dough.
- Shape Rolls Fast: Once proofed, shape the rolls within 15 minutes or they’ll start sticking to your hands. Wet your palms lightly and roll each piece into a smooth ball—no dimples or uneven lumps. This keeps them looking neat and baking evenly, so you don’t end up with lopsided, sad-looking rolls that bake at different rates.
Flavor customization for this active dry yeast bread roll
Sweet Glazed Rolls
For a touch of sweetness, brush the baked rolls with a mixture of 2 tablespoons melted butter and 1 tablespoon honey while still warm. Add a pinch of cinnamon for warmth—just ½ teaspoon is enough to enhance the flavor without overpowering.
These rolls pair beautifully with breakfast or as a dessert alongside vanilla ice cream. 🍯
Herb-Infused Rolls
Swap the plain dough for an aromatic twist by adding 1 tablespoon finely chopped fresh rosemary or thyme to the dough during kneading. The herbs mingle beautifully with the butter, creating a fragrant, earthy flavor. For a stronger taste, use 1 teaspoon dried herbs—just
For a savory kick, fold ½ cup shredded cheddar cheese and 1 minced garlic clove into the dough after the first rise. Shape the rolls as usual, but don’t overproof—the cheese can make them rise faster. Bake as directed, and finish with a sprinkle of garlic powder for extra depth. These rolls are perfect for dipping in marinara or serving with soups. 🧀 Transform your rolls into a bagel-inspired treat by adding 1 tablespoon sesame seeds, 1 teaspoon poppy seeds, 1 teaspoon dried garlic flakes, and 1 teaspoon onion flakes to the dough. Sprinkle them on top before the final proof, then bake as usual. For a crispier texture, bake for an extra 2-3 minutes—the seeds will toast beautifully. These rolls are ideal for sandwiches or as a snack with cream cheese. Swap 2 cups of all-purpose flour for whole wheat flour to add fiber and nuttiness. The dough will be slightly denser, so add 1 tablespoon extra milk to keep it tender. Proof the rolls for 5-10 minutes longer**—whole wheat dough rises slower. Brush the baked rolls with olive oil instead of butter for a lighter finish. These rolls are heartier and pair well with hearty stews or as a side for grilled vegetables. After baking, roll the warm rolls in a mix of 2 tablespoons melted butter, 3 tablespoons granulated sugar, and 1 teaspoon cinnamon. Press the mixture into the tops while still soft for a sticky, caramelized finish. Let them cool slightly before serving—this prevents the sugar from melting into a mess. These rolls are a crowd-pleaser for breakfast or dessert. 🌟Cheesy Garlic Rolls
Everything Bagel Rolls
Whole Wheat Twist
Cinnamon Sugar Rolls
Nutrition facts
Frequently asked questions
Why does my bread roll dough feel too sticky?
Sticky dough usually means you need more flour or proper kneading. Gradually add 1 tablespoon flour at a time while kneading until the dough becomes smooth but not dry. Wet hands help with shaping, but avoid over-wetting the dough—this prevents proper gluten development. If the dough cracks during shaping, it likely needs more kneading for 2-3 extra minutes.
Can I make these rolls without a stand mixer?
This recipe is designed for hand-kneading. Work the dough on a lightly floured surface for 8-10 minutes, pressing and folding until smooth. Use a dough scraper to keep everything contained. The key is patience—hand-kneading develops gluten just as effectively as a mixer when done properly.
What if my rolls don't rise enough?
Underproofing usually means your yeast wasn't active or the environment was too cold. First, check your yeast by testing its activation in warm water with sugar—it should bubble within 5-10 minutes. Keep your proofing area at 75-80°F (use a turned-off oven with the light on if needed). For faster rise, try 1 teaspoon more yeast next time. Never skip the first rise—it builds flavor and structure.
How do I store leftover bread rolls?
Cool rolls completely, then wrap tightly in plastic wrap or place in an airtight container. They'll stay fresh for 2-3 days at room temperature. For longer storage, freeze shaped (unbaked) rolls for up to 3 months. To reheat, bake frozen rolls at 350°F for 10-15 minutes or warm wrapped rolls in a 300°F oven for 5-10 minutes until steaming hot.
Can I make these rolls without butter?
Yes, but your rolls may be slightly less tender. Replace the ½ cup butter with ½ cup vegetable shortening or ¼ cup melted coconut oil for a dairy-free option. If using oil, the dough might feel slightly stickier—add 1 tablespoon extra flour during kneading. For flavor, add 1 teaspoon extra milk powder to compensate for the missing richness.