
Side Dishes
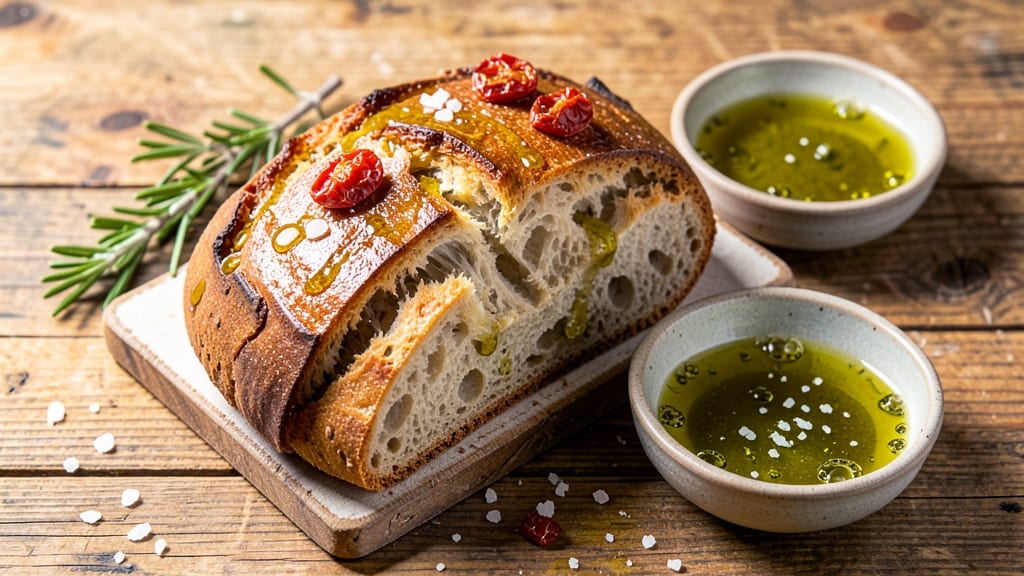
This artisan olive oil bread recipe delivers restaurant-quality results with a golden crust and fragrant interior—all without the fuss of traditional kneading. 💛 The secret lies in a simple no-knead method that develops deep flavor while keeping the process approachable for home bakers.
Olive oil plays a starring role here, contributing both richness and a delicate aroma that transforms ordinary bread into something extraordinary.
The beauty of this recipe is in its simplicity: just five ingredients combine to create bread with a crispy, caramelized exterior and a tender, airy crumb.
High-quality extra virgin olive oil infuses every bite with its signature fruity notes, while a long fermentation period allows the dough to develop complex flavors naturally. This method builds patience into the process, rewarding you with bread that tastes like it came from a specialty bakery.
What you'll end up with is a loaf of bread that's perfect for serving alongside charcuterie boards, soups, or as a side for any meal.
The golden crust gives way to a soft interior that's ideal for soaking up sauces, while the olive oil aroma makes every bite feel like a taste of the Mediterranean. The scoring technique ensures an even rise and that signature bakery-style crust.
Ready in just 30 minutes of active time plus overnight proofing, this recipe proves you don't need complicated techniques to create impressive results. The dough's simplicity makes it perfect for beginners, while the final product satisfies even the most discerning bread lovers. Let's get started on creating your perfect loaf.
Ingredients for artisan olive oil bread
Five simple ingredients transform into golden, fragrant artisan bread with just 30 minutes active time.
| Ingredient | Amount | Notes |
|---|---|---|
| Extra-Virgin Olive Oil 🫒 | ½ cup | High-quality, fruity variety preferred |
| All-Purpose Flour 🌾 | 4 cups | Bread flour for better structure |
| Instant Yeast 🍞 | ½ tsp | Ensures quick activation |
| Granulated Sugar 🍚 | 1 tbsp | Feeds yeast for rise |
| Warm Water 💧 | 1 ½ cups | 110°F for ideal yeast activation |
| Sea Salt 🧂 | 1 ½ tsp | Diamond Crystal preferred |
| Cornmeal 🌽 | ¼ cup | For dusting and crust texture |
| Coarse Kosher Salt 🧂 | 1 tbsp | For scoring and finishing |
The olive oil is non-negotiable here—look for extra-virgin with fruity notes like California Early Harvest or Italian Liguria at specialty stores. Whole Foods bulk section or Trader Joe's carry excellent options. Flour choice matters too: bread flour gives that signature chewy crumb, but all-purpose works in a pinch. Yeast is your flavor catalyst—use within expiration date or it’ll underperform. The sugar might seem minor, but it’s what kickstarts that magical fermentation. For the water, 110°F is ideal—too hot kills yeast, too cold slows it down.
No extra-virgin olive oil? Light olive oil works, but you’ll miss that fruity depth. Swap bread flour for all-purpose, but expect a slightly denser loaf. Yeast expired? Active dry yeast needs 10 minutes to proof in warm water first. Sugar substitute? Honey or maple syrup at half the amount adds richness. The coarse salt for scoring? Morton Kosher Salt is perfect—its texture creates those beautiful crust lines. Pro tip: if your kitchen’s humid, reduce water by 1 tbsp to avoid a gummy dough.
This dough is forgiving but rewards attention. Store in an airtight container overnight in the fridge—it’ll develop deeper flavor. The next morning, let it sit at room temp for 1 hour before shaping. For scoring, a razor blade or sharp knife works best. Bake immediately after scoring for that bakery-style crust. Leftovers? Toast within 2 days—fresh bread doesn’t reheat well. Freeze shaped loaves (unbaked) for up to 3 months—thaw overnight before baking.
Why You'll Love This Recipe
- Five-Minute Mix: The dough comes together faster than my coffee brews—just flour, yeast, sugar, and that golden olive oil swirled in. No kneading, no fuss, just a quick toss and a rest while you watch one episode of your favorite show.
- Olive Oil Magic: That first pull-apart bite? Rich, buttery, and unexpectedly complex thanks to the high-quality EVOO. It’s the kind of bread that makes you pause mid-slice, like, "Wait, is this actually homemade?"
- Weeknight Hero: Toss a loaf in the freezer for lazy mornings or reheat slices straight from the fridge for toast that’s almost as good as fresh-baked. My kids grab it before school without complaint—proof it’s a crowd-pleaser.
- Budget-Friendly Staple: A single batch feeds my family for days, and the ingredients? Basic, but the flavor feels gourmet. I’ve spent more on bread at cafés that tasted half as good. This is my secret for stretching groceries without sacrificing taste.
Step-by-step instructions for artisan olive oil bread
Here's how to craft a rustic loaf with a crisp crust and fragrant interior—no kneading required.
👨🍳 Step 1: Mix the Dough with Olive Oil Magic
In a large bowl, whisk together the 0.5 cup extra-virgin olive oil with the 1.5 cups warm water (110°F) until fully emulsified. The oil should break into tiny droplets, creating a silky base for your dough. Add the 1 tbsp granulated sugar and 0.5 tsp instant yeast, stirring until dissolved—this activates the yeast and starts the fermentation process.
Next, sprinkle the 4 cups all-purpose flour and 1.5 tsp sea salt over the wet ingredients. Using a wooden spoon or your hands, gently fold everything together until a shaggy dough forms. Here's the thing—don't overmix. You're aiming for a sticky, cohesive mass with a few dry spots remaining. This no-knead method relies on gentle handling to develop gluten naturally during the long rise.
⏰ Step 2: Let the Dough Rise Until Bubbly
Cover the bowl with plastic wrap or a damp kitchen towel and let it rest at room temperature for 1 hour. You'll see the dough transform dramatically—it should nearly double in size and develop bubbles along the surface. This is your yeast working its magic, creating air pockets that will give your bread its light, airy texture.
I know it's tempting to peek, but resist the urge. Every time you lift the cover, you release heat and moisture, which slows down fermentation. After 1 hour, give the dough a gentle stretch and fold—press your fingers into the dough about 2 inches deep and fold the sides toward the center. This redistributes the gluten and strengthens the structure without requiring kneading.
🥘 Step 3: Shape and Score for Crispy Perfection
Lightly dust a baking sheet with 0.25 cup cornmeal and transfer the dough to it. Wet your hands with water and gently shape the dough into a round loaf, about 8 inches in diameter. The dough will be sticky—this is normal with olive oil bread. Press down lightly to create a smooth surface, then sprinkle the remaining cornmeal evenly over the top.
Here's where the magic happens: Using a sharp serrated knife or lame, score the dough in a decorative pattern. I like a simple crosshatch or a zigzag—this allows steam to escape during baking, preventing the loaf from bursting open in the oven. The scored edges will become beautifully crispy and golden brown.
🔥 Step 4: Bake Until Golden and Hollow-Sounding
Preheat your oven to 425°F with a Dutch oven inside for 30 minutes. This creates a steamy environment that promotes oven spring and crispy crust. Carefully transfer the dough (with cornmeal) into the hot Dutch oven, cover with the lid, and bake for 25 minutes.
After 25 minutes, remove the lid and continue baking for another 10-15 minutes until the crust is deep golden brown and sounds hollow when tapped on the bottom. The internal temperature should reach 190-200°F. The aroma should be intoxicating—freshly baked bread with that unmistakable olive oil fragrance. If the top browns too quickly, tent loosely with foil to prevent over-browning.
⏰ Step 5: Cool and Finish with Coarse Salt
Remove the bread from the Dutch oven and transfer it to a wire rack. Let it cool for at least 30 minutes before slicing—this allows the gluten to relax and prevents a gummy interior. The bread will continue to firm up as it cools, developing that perfect crust-to-crumb ratio.
Before serving, sprinkle the top generously with 1 tbsp coarse kosher salt. The salt enhances all the flavors and adds a delightful textural contrast. Slice with a serrated knife and serve warm with olive oil for dipping—this bread is best enjoyed fresh from the oven when the crust is at its crispiest and the interior is still slightly warm and fragrant.
Pro Tips For Making Artisan Olive Oil Bread
- Use Room-Temp Oil: Cold olive oil slows yeast activity—pour that extra-virgin straight from the bottle at room temperature. I learned this the hard way when my dough took three hours to rise properly because I grabbed it straight from the fridge.
- Measure Yeast Like Salt: A heaping teaspoon of instant yeast isn’t the same as a level one—use the rice method (fill a teaspoon, level it off) for consistency. Too much yeast? Your bread will taste sharp and collapse. Too little? It’ll rise like a sad pancake.
- Knead Just Enough: This isn’t pizza dough—overworking the gluten makes the bread dense. Stop when the dough springs back slowly (not instantly) when poked. I used to knead until my arms gave out, and the bread turned out like a brick.
- Preheat Dutch Oven: A cold Dutch oven = soggy bottoms. Crank the oven to 475°F, place the pot in for 30 minutes, then bake. The steam from the hot pot gives you that perfect crust without extra effort. (Yes, even if you’re impatient like me.)
Regional styles of this recipe
Italian Panettone Style
Transform this bread into a festive Italian-inspired loaf by adding ½ cup candied citrus peel (orange or lemon) and ¼ cup raisins to the dough during the first rise. Shape the dough into a tall, round loaf and bake in a 9x2-inch round cake pan lined with parchment paper.
Brush the crust with extra-virgin olive oil mixed with 1 tbsp honey after baking for that signature Italian sweetness. Serve during holidays with a dusting of powdered sugar for a showstopping centerpiece. 🍊
Greek Focaccia Twist
For a Mediterranean-inspired variation, shape the dough into a flat oval on a parchment-lined baking sheet. Press your fingers into the dough to create dimples, then generously dot with 2 tbsp extra-virgin olive oil and sprinkle with 1 tsp dried oregano and 1 tsp flaky sea salt.
Bake uncovered at 425°F for 20-25 minutes until golden and crispy. Top with cherry tomatoes and feta cheese after baking for a rustic focaccia experience. 🍅
French Fougasse Adaptation
Create a rustic French-inspired bread by shaping the dough into an irregular oval with torn edges. Press your fingers into the dough to create pockets, then brush with extra-virgin olive oil and sprinkle with 1 tsp coarse sea salt.
Score deep lines across the top before baking at 425°F for 20-25 minutes. Add 1 tbsp chopped fresh rosemary to the dough for an aromatic twist. Serve warm with herb-infused olive oil for dipping. 🌿
Spanish Pan de Aceite
For a Spanish-inspired version, shape the dough into a round loaf and bake in a 9-inch cast-iron skillet lined with parchment paper. After baking, brush the warm crust with a mixture of 2 tbsp melted butter and 1 tbsp smoked paprika for a smoky, savory finish.
Sprinkle with 1 tsp coarse sea salt and serve with manchego cheese and jamón ibérico for a tapas-style experience. 🧀
Moroccan Olive Oil Bread
Infuse the dough with Moroccan flavors by adding 1 tsp ground cumin and 1 tsp ground coriander to the dry ingredients. Shape the dough into a round loaf and bake as directed.
After baking, brush the crust with extra-virgin olive oil mixed with 1 tsp harissa paste for a spicy kick. Garnish with toasted sesame seeds and serve with hummus or spiced lamb. 🌶️
Nutrition facts
Frequently asked questions
Why does this recipe use no-knead method?
The no-knead approach develops gluten naturally during the long rise, creating a tender crumb without overworking the dough. Olive oil's richness helps maintain moisture, while the overnight fermentation builds deep flavor—perfect for beginners who want restaurant-quality results with minimal effort.
Can I substitute butter for olive oil in this bread?
You can try, but the flavor and texture will change dramatically. Olive oil contributes fruity notes and a delicate aroma that butter can't replicate. For a butter version, reduce to ¼ cup melted butter and add ¼ cup warm milk to maintain moisture, but expect a denser crumb and less aromatic crust.
What's the best way to store leftover artisan bread?
Keep it in an airtight container at room temperature for 2-3 days—the crust stays crispy this way. For longer storage, freeze the baked loaf (wrapped tightly) for up to 3 months. Thaw overnight in the fridge before slicing. Toasting revives stale bread perfectly!
How do I know when the dough is ready to shape?
When properly proofed, the dough should be 50-75% larger than its original size with visible bubbles and a jiggly surface when gently pressed. It should also feel slightly springy to the touch—like a well-inflated balloon. If it's still flat after 1 hour, give it another 30 minutes of rising time.
Can I make this bread without a Dutch oven?
Yes! Use a heavy oven-safe skillet or cover the loaf with foil during the first 20 minutes of baking to trap steam. For extra crispiness, place a metal tray with 1 cup boiling water on the oven rack below. The bread may lack the dramatic oven spring but will still be delicious with a golden crust.