
Side Dishes
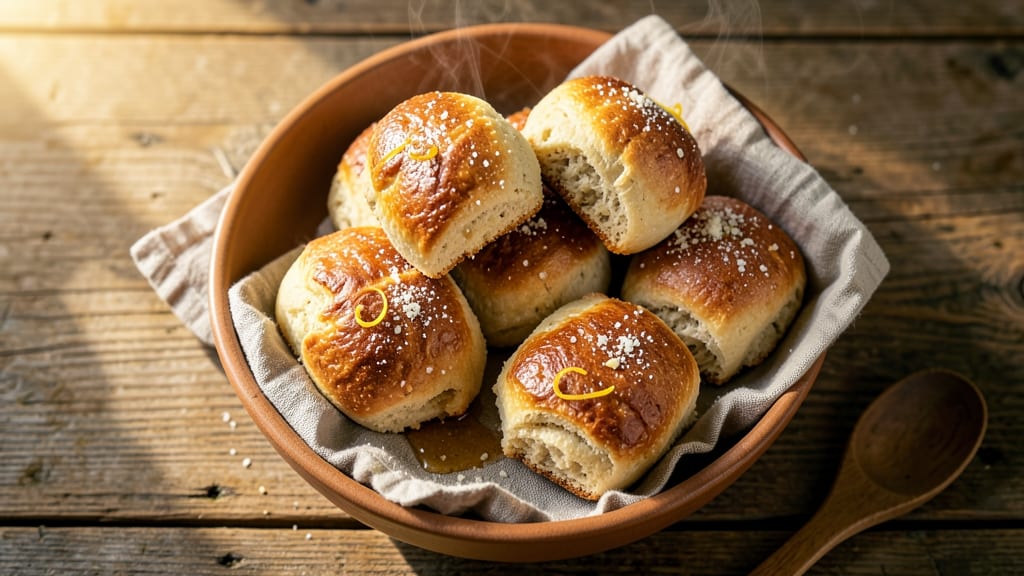
This almond flour bread rolls recipe delivers the perfect balance of crusty exteriors and tender, nutty centers—without a single grain of wheat.
After years of experimenting with gluten-free baking, I’ve finally cracked the code for rolls that hold their shape, bake evenly, and taste like they belong in a bakery display case.
The secret lies in the almond flour’s natural moisture retention and how it interacts with a few key ingredients to create that signature texture.
What sets these rolls apart is their foolproof technique, designed to work even for beginners. No special equipment is needed—just a mixing bowl, a stand mixer (or strong arms), and a little patience during proofing.
The dough comes together quickly, but the magic happens in the shaping and baking stages, where high heat creates that coveted crispy crust while keeping the interior soft and flavorful.
Almond flour’s richness also means you won’t miss the wheat flour—these rolls have a depth of flavor that’s hard to resist.
By the time they emerge from the oven, you’ll have golden, fragrant rolls with a satisfying crunch and a melt-in-your-mouth center. The nutty aroma alone makes them irresistible, and they’re versatile enough to pair with soups, stews, or even as a side for holiday meals.
The best part? They freeze beautifully, so you can bake a batch ahead and enjoy fresh rolls all week.
Ready to master these crusty, nutty bread rolls? The recipe includes optional add-ins like seeds or herbs for extra texture, and I’ll share my top tips for achieving that perfect bake every time. Let’s get started—your kitchen is about to smell like a bakery.
Ingredients for almond flour bread rolls
Twelve ingredients, twelve golden crowns—crusty, nutty, and utterly foolproof.
| Ingredient | Amount | Notes |
|---|---|---|
| Blanched Almond Flour 🌰 | 3 cups | Finely ground, unsweetened |
| Tapioca Flour 🍚 | ½ cup | For binding and elasticity |
| Psyllium Husk Powder 🌿 | 1 ½ tbsp | Essential for structure |
| Granulated Sugar 🍚 | ¼ cup | Or coconut sugar for depth |
| Active Dry Yeast 🍞 | 2 ¼ tsp | Instant yeast preferred |
| Warm Water 💧 | 1 cup | 110°F, not hot |
| Vegetable Oil 🫒 | ¼ cup | Or melted coconut oil |
| Apple Cider Vinegar 🍎 | 1 tbsp | For tang and rise |
| Salt 🧂 | 1 ½ tsp | Fine sea salt preferred |
| Sesame Seeds 🌻 | 1 tbsp | Optional for texture |
| Poppy Seeds 🌼 | 1 tbsp | Optional for crunch |
| Olive Oil 🫒 | 2 tbsp | For brushing rolls |
Almond flour is the star here—Bob's Red Mill or Anthony's Goods brands are my go-tos for consistent texture. The key is blanched almond flour (not raw), which has a milder flavor and better moisture retention. If you can't find it, toast regular almond flour for 5 minutes to remove bitterness. Psyllium husk might sound odd, but it's what gives these rolls their structure—NOW Foods sells it in bulk. For the yeast, Saf-Instant is my secret weapon—it activates instantly without proofing time. Store almond flour in the freezer to prevent rancidity, and buy yeast in small amounts since it loses potency after 3 months.
No tapioca flour? Arrowroot powder at 1:1 ratio works in a pinch, though texture might differ slightly. Subbing coconut sugar for granulated? Reduce by 10%—it's sweeter. The apple cider vinegar is non-negotiable—it mimics the acidity of wheat flour and helps the dough rise properly. For seeds, Trader Joe's has great bulk bins. Want extra flavor? Swap half the almond flour for sunflower seed flour. The oil can be any neutral variety, but avocado oil has a higher smoke point for crispier crusts. And yes, you can make these without seeds—they're just for crunch.
Freshly mixed dough keeps for 2 days in the fridge, wrapped tightly. For longer storage, freeze shaped rolls on a tray before bagging—they'll keep for 3 months. Thaw overnight in the fridge before baking. The rolls reheat beautifully—just 5 minutes at 350°F to restore that bakery-fresh crunch. Bake a double batch and freeze half; nothing beats pulling a roll straight from the freezer to the oven for a quick meal. The aroma alone will have your kitchen smelling like a Parisian boulangerie.
Why You'll Love This Recipe
- No-Knead Magic: I swear by this dough—just mix, rest, and bake. The psyllium husk powder does all the heavy lifting, so no rolling or shaping stress. Honestly, my hands stay cleaner than when I make regular bread.
- Nutty Crunch Surprise: That almond flour isn’t just for flavor—it adds a textural punch. Warm rolls with a subtle crunch? Yes, even on a Tuesday night. The tapioca flour keeps them tender, but the almonds make every bite feel special.
- Weeknight Hero: Freeze half the batch and pull them out for busy days. Toss in a sandwich or warm with butter—no one will guess they’re gluten-free. (My kids grab them straight from the freezer when I’m running late.)
- Budget-Friendly Luxury: Almond flour’s pricey, but this recipe uses just enough to make it feel indulgent without breaking the bank. The yeast and sugar combo gives you that classic bread taste, so you’re not sacrificing flavor for a lighter wallet.
Step-by-step instructions for almond flour bread rolls
Here's how to craft these nutty, crusty rolls with a soft center—every step ensures perfect texture.
Activate the Yeast for Maximum Rise
In a small bowl, whisk together the 1 cup warm water (about 110°F), 2.25 teaspoons active dry yeast, and 1 tablespoon apple cider vinegar. Let it sit for 5-10 minutes until it becomes frothy and bubbly. This step ensures your rolls rise beautifully—no flat, dense centers here. If the mixture doesn't bubble, your yeast might be dead, and you'll need to start over.
While waiting, measure out the 3 cups blanched almond flour, 0.5 cup tapioca flour, 1.5 teaspoons psyllium husk powder, 0.25 cup granulated sugar, and 1.5 teaspoons salt in a large mixing bowl. The psyllium husk powder is key—it binds the dry ingredients and gives these rolls their signature structure. Sift everything together lightly to avoid clumps, which can lead to uneven texture in your rolls.
Mix the Dough to Perfect Consistency
Add the yeast mixture to the dry ingredients and stir in the 0.25 cup vegetable oil. Use a wooden spoon or dough whisk to combine until you have a thick, shaggy dough. It should look dry but clump together when pressed—this is normal for almond flour dough. If it's too crumbly, add 1 tablespoon warm water at a time until it holds together when squeezed.
Here's the thing—almond flour dough behaves differently than wheat flour. It's more fragile, so handle it gently. Once the dough comes together, turn it out onto a lightly floured surface and knead it 5-7 times just until smooth. Over-kneading develops gluten, which these rolls don't need. The dough should be soft but not sticky—if it's too wet, add a sprinkle of almond flour to firm it up.
Let the Dough Rest for Optimal Texture
Shape the dough into a log and place it in a lightly oiled bowl. Cover it with a damp kitchen towel and let it rest at room temperature for 30 minutes. This resting period allows the psyllium husk to fully hydrate and the dough to relax, making it easier to handle when shaping. Don't skip this step—it's what gives these rolls their tender crumb.
After resting, the dough should be slightly puffy and easier to work with. If it's still firm, let it rest another 10 minutes. The goal is to create rolls with a crisp exterior and a soft, nutty interior—this resting time is what makes that happen. While it rests, preheat your oven to 350°F and line two baking sheets with parchment paper.
Shape and Proof the Rolls
Divide the dough into 12 equal pieces (about 1.5 ounces each). Roll each piece into a smooth ball, then place them on the prepared baking sheets, spacing them about 1.5 inches apart. They won't spread much, so you can get them close without worrying about them sticking together. Brush the tops lightly with 1 tablespoon olive oil to encourage browning.
Cover the rolls loosely with the damp towel and let them proof for 20-25 minutes until they've puffed up about 50%. You'll see them rise gently—this is your cue that the yeast is doing its job. If they rise too quickly, your kitchen might be too warm, and they'll overproof. For extra flavor, sprinkle the 1 tablespoon sesame seeds and 1 tablespoon poppy seeds over the tops just before baking.
Bake to Golden Perfection
Bake the rolls in the preheated oven for 20-25 minutes until they're deep golden brown and sound hollow when tapped on the bottom. The centers should still be soft—almond flour bread doesn't crisp up like wheat bread, so aim for a warm, pillowy interior. Rotate the baking sheets halfway through for even browning.
Let the rolls cool on the baking sheets for 5 minutes before transferring them to a wire rack. This brief rest prevents them from falling apart when you move them. Serve warm, and you'll get that perfect contrast of crispy crust and soft, nutty center. These rolls pair beautifully with soups, stews, or even as a side to roasted meats—every bite is a flavor explosion!
Pro Tips For Making Almond Flour Bread Rolls
- Mix the Psyllium First: Almond flour bread rolls need psyllium husk powder to hold together, but it behaves like glue when dry. Whisk it into the warm water before adding other liquids—this prevents clumping and ensures even distribution. I learned this the hard way when my first batch turned into a dense brick instead of tender rolls.
- Proof Yeast in Warm Water: Active dry yeast in almond flour dough is trickier than wheat flour because the fat content can slow fermentation. Proof your yeast in warm water (105–110°F) with a pinch of sugar for 5 minutes until foamy before mixing with the dry ingredients. This guarantees it’s alive and ready to work—no waiting around for a sluggish rise.
- Don’t Overmix the Dough: Almond flour dough is delicate, and blending it too long develops gluten where there’s none to begin with. Mix just until the psyllium forms a sticky, shaggy mass—about 2 minutes by hand or until combined. Overworking it turns your rolls into dense, chewy hockey pucks instead of light, airy bites.
- Chill the Dough Overnight: Skipping the cold proof is the fastest way to end up with flat, sad rolls. After the first rise, shape the dough and refrigerate it for 8–12 hours. The cold slows fermentation, lets the psyllium fully hydrate, and guarantees a better oven spring. (Yes, even if you’re impatient like me—trust the process.)
Troubleshooting perfect results
Dense, Flat Rolls
If your rolls turn out dense instead of light and airy, the issue is likely underproofing or too much handling. Almond flour dough is delicate—overworking it destroys the tender texture.
To fix this, let the dough rest for the full 30 minutes before shaping, and proof the rolls for the full 20-25 minutes. Also, ensure your yeast is active by testing it in warm water first—dead yeast won’t activate properly.
For next time, try adding ½ teaspoon extra yeast if your kitchen is cold. 💡
Dry, Crumbly Texture
Dry rolls usually mean the dough was too dry or didn’t absorb enough moisture. Almond flour is thirsty—if your dough feels like sand, add 1 tablespoon warm water at a time until it just holds together. For extra moisture, brush the tops with 2 tablespoons olive oil before baking.
If the rolls still turn out dry, try replacing ¼ cup almond flour with sunflower seed flour, which holds moisture better. Store-bought almond flour can vary in moisture content, so check the package for freshness.
Uneven Baking
If some rolls bake faster than others, your oven might have hot spots or uneven heat distribution. Rotate the baking sheets halfway through baking for even browning. Preheat your oven for at least 20 minutes to ensure consistent temperature.
For extra insurance, bake one sheet at a time if your oven is small. If the tops brown too quickly but the centers stay doughy, tent the rolls loosely with foil after 15 minutes to prevent over-browning while they finish cooking.
Sticky Dough Nightmare
Sticky dough happens when the oil or water ratio is off. If your dough is too wet, sprinkle it with 1 tablespoon almond flour and knead gently just until it firms up.
For future batches, reduce the oil by 1 tablespoon or the water by 1 tablespoon if your kitchen is humid. Chill the dough for 10 minutes before shaping—cold dough is easier to handle and less likely to stick.
Use a light dusting of almond flour (not wheat flour) on your surface to prevent sticking without altering flavor.
Rolls Fall Apart
If your rolls crumble when moving them, they likely didn’t rest or proof enough. The psyllium husk needs time to fully hydrate, so never skip the 30-minute rest before shaping. For extra structure, increase the psyllium husk by ½ teaspoon next time.
When transferring baked rolls to a rack, let them cool on the baking sheet for the full 5 minutes—this helps them set before handling. If they still fall apart, try shaping them slightly larger and flattening the tops gently with your palm before baking.
Pale, Bland Flavor
Bland rolls usually mean the yeast didn’t activate properly or the dough lacked flavor depth. Always use warm water (110°F) to activate the yeast—too hot water kills it, and too cold water slows it down.
For extra flavor, add 1 teaspoon garlic powder or ½ teaspoon onion powder to the dry ingredients. A pinch of smoked paprika adds warmth without overpowering. Toast the almond flour for 5 minutes before mixing to enhance its nutty aroma—just don’t let it burn!
Nutrition facts
Frequently asked questions
Why does this recipe use psyllium husk powder?
Psyllium husk powder acts as a natural binder and gives these almond flour rolls their signature structure and chewiness. Unlike wheat flour, almond flour lacks gluten, so psyllium mimics that elastic quality while keeping the rolls tender. It also helps with moisture retention, preventing dryness in the final product. Think of it as the secret ingredient that makes these rolls hold their shape while staying soft inside.
Can I make these rolls without a stand mixer?
While a stand mixer makes mixing easier, these rolls can be made entirely by hand. Use a wooden spoon or dough whisk to combine ingredients in the bowl, then turn the dough out onto a lightly floured surface and knead gently just 5-7 times—no need for vigorous kneading. The dough is delicate, so handle it with care to avoid overworking it.
How do I store or reheat baked almond flour rolls?
Freshly baked rolls stay good at room temperature for 2 days in an airtight container, but they're best enjoyed warm. For longer storage, freeze shaped rolls on a tray before bagging—they'll keep for 3 months. To reheat, bake at 350°F for 5-7 minutes until warmed through. For extra crispiness, brush with olive oil before reheating.
What can I substitute if I don't have tapioca flour?
Arrowroot powder works in a 1:1 ratio as a tapioca substitute, though the texture may differ slightly. For best results, try sunflower seed flour instead—it binds similarly and adds extra nutty flavor. If using arrowroot, expect rolls that might be slightly more delicate. Always sift your flours to prevent clumping in the dough.
Can I make these rolls without seeds?
The sesame and poppy seeds are purely for texture and flavor—they're completely optional. If you prefer a simpler presentation, just skip them. For extra flavor, try adding 1 teaspoon garlic powder or ½ teaspoon smoked paprika to the dough instead. The rolls will still be delicious without any toppings.