
Side Dishes
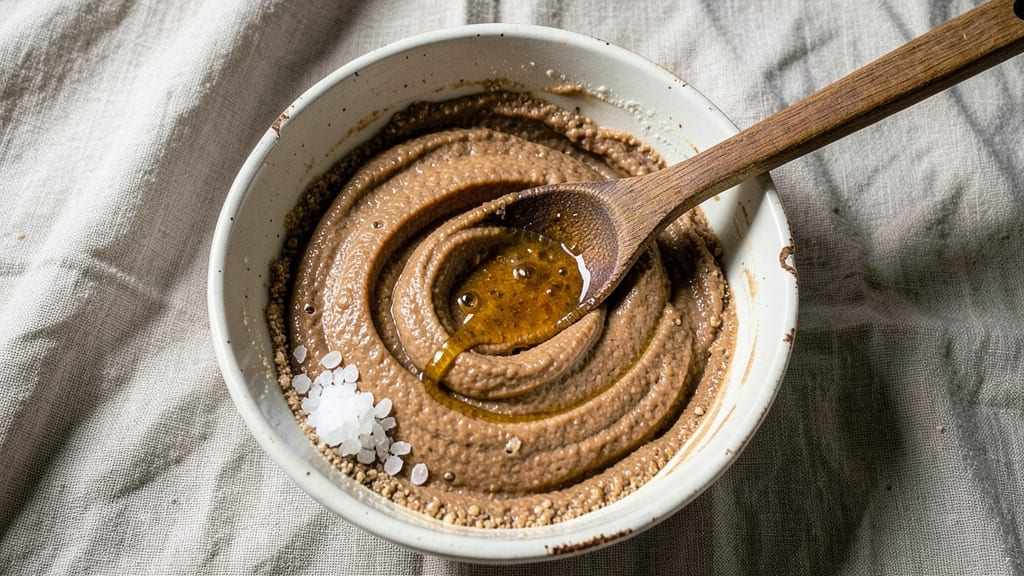
This ancient sourdough bread recipe brings centuries-old baking traditions to your kitchen with a tangy depth that modern loaves can't match. The key lies in patient fermentation—letting wild yeast and lactic acid bacteria develop naturally over days, not hours.
I've perfected this method through years of experimentation, balancing hydration and fermentation time to achieve that signature open crumb and crispy crust.
The process begins with a starter that's been nurtured for at least a week, creating a complex flavor profile that's both tangy and slightly sweet. You'll work with a dough that's wetter than traditional sourdough, requiring careful handling but yielding an airy, open crumb structure.
The proofing stage is where the magic happens—long, slow rises at controlled temperatures develop those signature flavor compounds.
What emerges from your oven is a loaf with a golden, crackling crust and an interior filled with large, irregular holes—proof of proper fermentation. The flavor is more complex than commercial bread, with layers of tanginess and subtle sweetness from the slow fermentation.
This isn't just bread; it's a living food that captures the essence of traditional baking techniques.
The beauty of this recipe lies in its adaptability—you can adjust hydration levels for different textures or experiment with whole grains for added nutrition. Whether you're baking for tradition or simply craving superior flavor, this method delivers results that will change how you view bread forever.
Let's get started on creating your own ancient-style loaf.
Ingredients for ancient sourdough bread
Patient fermentation transforms these simple ingredients into bread with ancient flavor complexity.
| Ingredient | Amount | Notes |
|---|---|---|
| Active Sourdough Starter 🍞 | ½ cup | Fed and bubbly, 100% hydration |
| All-Purpose Flour 🌾 | 3 ½ cups | Unbleached, high protein preferred |
| Whole Wheat Flour 🌾 | ½ cup | For added nutrition and texture |
| Filtered Water 💧 | 2 ¼ cups | Room temperature, 70-75°F |
| Kosher Salt 🧂 | 1 ½ tsp | Diamond Crystal preferred |
| Honey 🍯 | 1 tbsp | Raw, unprocessed for fermentation |
| Olive Oil 🫒 | 1 tbsp | Extra-virgin, for dough handling |
| Rice Flour 🌾 | 2 tbsp | For dusting and scoring |
| Cornmeal 🌽 | 2 tbsp | For baking surface |
Your sourdough starter is the foundation—it should be active and bubbly, with a tangy aroma. If you're new to starters, King Arthur or Bob's Red Mill sell reliable starters, or cultivate your own using equal parts flour and water over 5-7 days. The whole wheat flour adds depth and nutrition, but if you prefer a lighter crumb, swap it for all-purpose. For the flours, Bread flour works beautifully for structure, but all-purpose gives a more open crumb. Store-bought flour? Check the expiration date—older flour loses its strength.
No honey? Maple syrup or agave nectar work in a pinch, though honey's enzymes help fermentation. Short on olive oil? Vegetable oil or melted coconut oil are fine, but olive oil adds subtle fruitiness. The rice flour creates a crispy crust—skip it if you're not scoring your loaf. For scoring, a razor blade or lame gives the cleanest cuts, but a sharp knife works too. If your kitchen's humid, reduce water slightly to prevent a sticky dough. The cornmeal on the baking sheet prevents sticking, but semolina or flour works just as well.
This dough is highly hydrated—handle it gently to avoid tearing. Store any unused starter in an airtight container at room temperature, feeding it every 24 hours. The dough itself keeps 24 hours refrigerated before shaping, and shaped loaves can proof up to 12 hours in the fridge for deeper flavor. Baked loaves stay fresh 3-4 days at room temperature, wrapped in a cloth. For longer storage, freeze slices wrapped in parchment—reheat in a 350°F oven for 5-10 minutes to restore crispness.
Why You'll Love This Recipe
- Four-Ingredient Magic: I swear by this combo—just starter, flours, water, and salt. No yeast, no fuss, no overcomplicating. Honestly, the mixing bowl is my favorite part because it’s that simple.
- Crusty-Creamy Payoff: That golden crust with a pillowy interior? It’s the whole wheat’s fault—it adds depth while keeping the crumb tender. The salt? It’s the unsung hero making every bite taste like a bakery secret.
- Weeknight & Holiday: I make this on lazy Sundays, but it’s also my go-to for dinner parties. Toast it with jam for breakfast or tear it over soup when guests arrive. Same effort, endless uses.
- Stretches My Budget: A single batch feeds my family for days. Freeze half for when I’m too tired to bake, and the whole wheat keeps it feeling nourishing without breaking the bank. (Yes, even on a Tuesday night.)
Step-by-step instructions for ancient sourdough bread
Here's the method that delivers that signature tangy depth and crispy crust we all love.
Mix the Dough with Precision
In a large mixing bowl, combine the 0.5 cup active sourdough starter, 3.5 cups all-purpose flour, and 0.5 cup whole wheat flour. Use a wooden spoon or dough whisk to break up any lumps in the dry ingredients before adding the 2.25 cups filtered water at room temperature. This hydration level creates a slightly open crumb structure perfect for this ancient technique.
Next, add the 1 tbsp honey and 1 tbsp extra-virgin olive oil. The honey not only feeds the fermentation but also adds subtle sweetness that balances the tang. Mix everything together until you have a shaggy dough that comes together when pressed. This initial mix should take about 3-4 minutes—don't rush it. The dough will be sticky, which is normal with this hydration level.
Autolyse for Optimal Gluten Development
Cover the bowl with a damp kitchen towel or plastic wrap and let the dough rest for 30 minutes. This autolyse stage allows the flour to fully hydrate and the gluten to begin developing naturally. You'll notice the dough becomes smoother and more cohesive during this time—this is your signal that the process is working.
After 30 minutes, add the 1.5 tsp kosher salt and perform a series of stretch-and-folds every 30 minutes for 2 hours total. For each fold, wet your hands slightly, grab one side of the dough, stretch it upward, and fold it over itself. Rotate the bowl and repeat. This technique strengthens the gluten structure without overworking the dough, which is crucial for that open, airy crumb we're after.
Bulk Fermentation with Controlled Conditions
After the final stretch-and-fold, let the dough rest undisturbed at room temperature (70-75°F) for 4-6 hours, or until it has increased by 50-75% in volume. You'll know it's ready when the dough springs back slowly when poked with a finger and leaves a clear indentation. The longer fermentation time develops those complex flavors we associate with ancient sourdough techniques.
Here's where it gets interesting: if your kitchen is warmer than 75°F, reduce fermentation time to 3-4 hours to prevent overproofing. The dough should be bubbly and jiggly at the edges—this indicates proper fermentation. If it rises too quickly, place it in the refrigerator for 12-24 hours to slow fermentation and develop more flavor, but this step isn't necessary for immediate baking.
Shape and Final Proof
Lightly dust a clean work surface with 2 tbsp rice flour. Turn out the dough and gently shape it into a round boule by pulling the edges toward the center and tucking them underneath. This shaping creates surface tension that helps maintain the shape during baking. The dough should feel slightly resistant but not too tight—it should still spring back when poked.
Place the shaped boule seam-side up in a lightly oiled bowl and cover with plastic wrap. Let it proof at room temperature for 1-2 hours, or until it has risen by about 25-30%. The surface should look slightly domed and feel firm to the touch. This final proof is crucial—it's what gives that beautiful oven spring and crispy crust we're after.
Bake for Maximum Crust Development
Preheat your oven to 450°F with a Dutch oven inside for 45 minutes. This high heat and steam environment creates that signature crispy crust. Carefully transfer the dough to a piece of parchment paper, then invert it into the hot Dutch oven. If you don't have a Dutch oven, use a heavy baking sheet and cover it tightly with foil.
Bake for 25 minutes covered, then remove the lid and bake for another 15-20 minutes until the bread is deep golden brown. The internal temperature should reach 205-210°F when measured with an instant-read thermometer. Tap the bottom—it should sound hollow. Immediately after removing from the oven, brush the crust with a bit of water if you want extra shine, then let it cool on a wire rack for at least 1 hour before slicing.
Pro Tips For Making Ancient Sourdough Bread
- STRETCH AND FOLD: Use a bench scraper to fold dough—press, stretch, and turn the dough away from you in three sets of 30-second stretches. I learned this the hard way by using my hands, which weakens gluten and makes shaping harder later.
- WEIGH YOUR WHOLE WHEAT: Whole wheat flour absorbs more water than all-purpose—measure it by weight (grams) instead of volume. I was skeptical until I tried it; my dense, gummy loaves vanished after switching to a scale.
- SKIP THE OVERPROOFING: Check dough readiness by doing the "poke test": press a finger in—if it springs back slowly (not fast, not collapsed), it’s ready. Overproofing turns your ancient sourdough into a sad, flat pancake.
- USE COLD WATER: Mix your starter and flour with water straight from the fridge—it slows fermentation just enough to give you more control. Sounds weird, but it works: my dough now develops flavor without racing out of control.
Essential equipment for great ancient sourdough bread
Dutch Oven Essentials
Your Dutch oven is the single most important tool for ancient sourdough—it traps steam during baking, creating that signature crispy crust while keeping the crumb tender. I recommend a 5-6 quart enameled cast iron like the Lodge 5.5-Quart Dutch Oven—it retains heat beautifully and lasts forever.
For budget options, the Amazon Basics version works well for occasional baking. Preheat your Dutch oven with the dough inside for 45 minutes at 450°F to mimic a traditional brick oven's steam environment. 🔥
Digital Thermometer
A laser thermometer or instant-read probe is non-negotiable for perfect results. I use the Thermoworks Thermapen ONE to monitor both oven temperature and dough's internal temp (205-210°F). For fermentation, a simple kitchen thermometer helps track your 70-75°F ideal range.
Without precise temperature control, you risk overproofing or underbaked bread. This small investment prevents costly mistakes during the critical baking stage.
Baking Steel Alternative
If you lack a Dutch oven, a baking steel like the Baking Steel Pro creates similar steam conditions. Place it on the oven rack and bake your loaf directly on it—just add 1 cup of boiling water to the oven when loading the dough.
For no-budget options, a heavy baking sheet with a tight foil tent works in a pinch. The key is maintaining that 90%+ humidity during the initial 25 minutes of baking to develop that crackly crust.
Scoring Tools
Scoring isn't just decorative—it directs oven spring and prevents random cracks. My go-to is a Lame (a long, thin razor blade on a handle), but a sharp serrated knife or single-edge razor works too. Dip your tool in rice flour before scoring to prevent sticking.
For the classic boule, make a ½-inch deep slash in a crosshatch pattern. The cut should be clean—hesitation creates ragged edges that ruin the aesthetic and trap steam unevenly. 💫
Proofing Containers
Your proofing environment matters as much as your starter. Use a lightly oiled bowl for the final proof to prevent sticking, but for bulk fermentation, I prefer a proofing box like the Proof Box by Proof Baker to maintain 80-85% humidity.
For DIY solutions, place a damp towel over your dough in a sealed container. Never skip this step—proper proofing develops the open crumb structure and complex flavors that define ancient sourdough.
Flour Dusting Supplies
Rice flour is ideal for dusting because it creates a crispy crust when baked, but semolina or all-purpose flour work too. Keep a small bowl of fine rice flour near your work surface—this prevents sticking during shaping.
For scoring, I also keep a small brush handy to dust flour onto my lame before each cut. The right dusting technique makes all the difference when handling this highly hydrated dough—less flour means better texture, but too little causes tears. 🌾
Nutrition facts
Frequently asked questions
How long does it take to make this ancient sourdough?
Active baking time is about 12-16 hours from start to finish, but the process is flexible. The initial 4-6 hour bulk fermentation is critical, followed by 1-2 hours of final proofing and 40 minutes of baking. You can slow down fermentation by refrigerating the dough for 12-24 hours between stages to develop deeper flavors—this is especially useful in warm kitchens.
What makes this recipe truly "ancient"?
This method mimics traditional techniques using only wild yeast and lactic acid bacteria from the sourdough starter—no commercial yeast. The long fermentation times (4-6+ hours) allow these microbes to develop complex flavors naturally, just as they would have centuries ago. The high hydration and slow bulk rise also recreate the open crumb structure found in historical breads.
Can I use this dough for sandwiches?
The open crumb structure makes it perfect for sandwiches, but slice it 1-2 hours after baking when it's fully cooled. For extra tenderness, lightly toast slices before assembling. The tangy flavor pairs beautifully with rich fillings like smoked salmon or sharp cheddar, while the crispy crust adds satisfying texture.
What if my dough doesn't rise properly?
Check three things first:
- Starter activity (it should float in water),
- Temperature (keep between 70-75°F), and
- Time (minimum 4 hours bulk fermentation). If it's still flat, try adding 1 tsp sugar to feed fermentation, or extend proofing time. Cold weather? Move your dough to a warmer spot (like near the oven with light on).
How do I store leftovers?
Wrap cooled loaves in a clean kitchen towel (not plastic) and store at room temperature for 3-4 days. For longer storage, freeze slices wrapped in parchment. To revive stale bread, warm slices in a 350°F oven for 5-10 minutes until crispy again. The whole wheat flour in this recipe adds extra freshness—it stays soft longer than all-purpose bread.