
Side Dishes
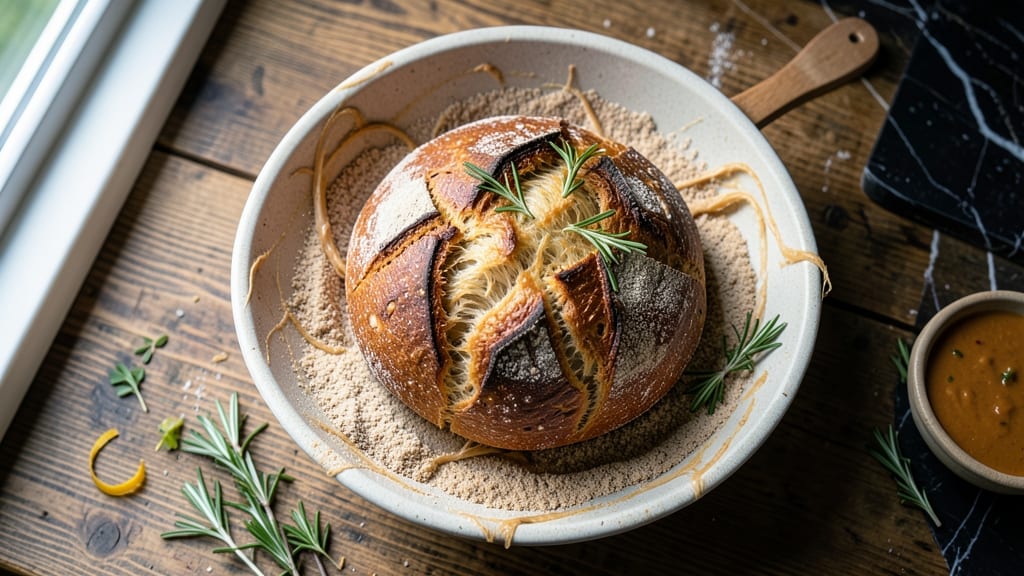
This artisan country bread recipe transforms simple ingredients into a rustic loaf with a crusty exterior and airy interior—no fancy equipment required. The secret lies in a well-fed sourdough starter that develops complex flavors over time, creating a loaf that rivals bakery-quality bread.
I’ve perfected this method after years of experimentation, ensuring a foolproof process that delivers consistent results every time.
What sets this recipe apart is the attention to detail during kneading and proofing, which develops gluten for that signature chewy crumb and crispy crust. The dough comes together with just five ingredients—flour, water, salt, and your sourdough starter—making it both simple and impressive.
Baking at high heat creates the perfect caramelization, giving your bread that authentic country bakery flavor.
By the time you pull this loaf from the oven, you’ll have a loaf with a golden, crackling crust and a soft, open crumb that’s perfect for soaking up soups, spreading with butter, or serving alongside charcuterie.
The aroma alone will have everyone gathered around your table, and the texture is impossible to resist. This is bread that feels like a hug in every bite.
Whether you’re a beginner or an experienced baker, this recipe is designed to succeed. The instructions are clear, the process is straightforward, and the results are undeniably rewarding. Let’s get started on your first loaf—your kitchen will never smell the same again.
Ingredients for artisan country bread
Five simple ingredients transform into a rustic loaf with golden crust and airy crumb—no kneading machine needed.
| Ingredient | Amount | Notes |
|---|---|---|
| Active Sourdough Starter 🍞 | ½ cup | 100% hydration, fed 12 hours prior |
| All-Purpose Flour 🌾 | 4 cups | King Arthur or similar high-gluten |
| Bread Flour 🌾 | 2 cups | For optimal gluten development |
| Filtered Water 💧 | 2 ½ cups | Room temperature, 70°F |
| Kosher Salt 🧂 | 1 ½ tsp | Diamond Crystal preferred |
| Cornmeal 🌽 | ¼ cup | For dusting parchment paper |
| Ice Water ❄️ | ½ cup | For final dough adjustment |
Your sourdough starter is the heart of this loaf, so it needs to be lively and bubbly. King Arthur or similar brands work best for the flours—they provide that perfect balance of protein and gluten structure. If you're using a store-bought starter, make sure it's been fed within the last 12 hours and has doubled in size. The bread flour gives that signature chewy texture, while the all-purpose flour adds tenderness. For the water, room temperature is key—too cold and the yeast won't activate properly, too warm and it'll overproof. I always measure mine at exactly 70°F using a kitchen thermometer.
No bread flour? Add 1 tablespoon vital wheat gluten per cup of all-purpose flour to mimic the protein content. Running short on time? Use 1 extra tablespoon of water per cup of flour to help the gluten develop faster during mixing. The cornmeal isn't just for looks—it prevents sticking and adds a lovely golden hue to the crust. For the salt, Diamond Crystal measures differently than Morton's, so if you're using the latter, reduce to 1 teaspoon. The ice water at the end is crucial for tightening the gluten and creating that perfect oven spring—don't skip it, even if your dough feels perfect without it.
This dough keeps beautifully for 24 hours in the fridge if you want to shape it ahead. For the best flavor, bake within 8 hours of mixing. Once baked, store wrapped in a clean kitchen towel for 3 days at room temperature, or freeze for 3 months. The crust stays crisp for about 2 days if kept in an airtight bag. I always make two loaves—one for the table, one for freezing. The aroma alone when you pull it from the oven? That's the real reward.
Why You'll Love This Recipe
- No-Knead Magic: I swear by this—just mix, let it rise, and bake. The sourdough starter does all the hard work while you sip coffee or scroll. No stand mixer, no overworking your arms, just hands-off perfection.
- Crust That Cracks: That golden, shatteringly crisp crust? It’s the bread flour’s job, but honestly, it’s the star. Tear into it fresh, and you’ll hear the satisfying snap—then watch everyone at the table pause to take a bite.
- Weeknight Workhorse: Toss a loaf in the oven while dinner simmers. It’s my go-to for sandwiches, toast, or even croutons—no fancy prep, just reliable flavor. (Yes, even when I forget to meal prep.)
- Dollar Stretcher: A single starter batch feeds me for days. The mix of all-purpose and bread flour keeps costs low, and the leftovers? Freeze slices for toast or soup toppings later. Frugal but never boring.
Step-by-step instructions for artisan country bread
Here's how to craft rustic, crusty country bread with a crisp exterior and airy crumb—every slice packed with sourdough character.
Autolyse the Dough for Maximum Gluten Development
In a large mixing bowl, combine the 4 cups all-purpose flour and 2 cups bread flour. Create a well in the center and add the 0.5 cup active sourdough starter. Slowly pour in the 2.5 cups filtered water while mixing with a wooden spoon until just combined—you'll see shaggy strands forming.
Let the dough rest for 20 minutes at room temperature. This autolyse step hydrates the flour completely and begins gluten development, which translates to a lighter, more open crumb structure. The dough will look like a stiff paste with no dry bits remaining—this is perfect. Avoid the urge to knead yet; patience here pays off in texture.
Incorporate Salt and Perform Initial Kneading
After the autolyse, sprinkle the 1.5 teaspoons kosher salt evenly over the dough. Using your hands, gently work the salt into the outer edges first, then gradually incorporate it into the center. This prevents salt from creating concentrated pockets that could affect flavor distribution.
Turn the dough out onto a lightly floured surface and begin kneading. Push the dough away from you with the heels of your hands, then fold it back toward you. Rotate the dough 90 degrees after each fold and repeat for 8-10 minutes until the dough becomes smooth and elastic. You'll know it's ready when it springs back slowly when poked—this indicates proper gluten formation. The dough should feel slightly tacky but not sticky.
Bulk Fermentation with Strategic Folding
Shape the dough into a loose ball and place it back in the mixing bowl. Cover with a damp kitchen towel and let it ferment at 70°F for 4-5 hours. During this time, perform three sets of stretch-and-folds at 30-minute intervals—this strengthens the gluten structure and develops flavor.
For each set, wet your hands to prevent sticking, then grab one side of the dough, stretch it upward, and fold it over itself. Rotate the bowl and repeat on all four sides. After the final fold, let the dough rest uncovered for 15 minutes before covering again. The dough should nearly double in size and develop small bubbles on the surface—this indicates active fermentation and proper gluten relaxation.
Shape and Final Proof Before Baking
Turn the dough out onto a lightly floured surface and gently shape it into a 12-inch round loaf by pulling the edges toward the center. Place the shaped dough seam-side up on a parchment-lined baking sheet dusted with 0.25 cup cornmeal. Cover loosely and let it proof for 1-2 hours until it has risen 50-75% and looks slightly domed.
To test readiness, gently press your finger into the dough—if it springs back slowly (not immediately), it's ready. If the dough collapses when poked, it needs more time. The surface should develop small cracks and look slightly puffy. This final proof is crucial for achieving that signature country bread height and open crumb.
Score and Bake for Crusty Perfection
Preheat your oven to 450°F with a Dutch oven inside for 30 minutes. Remove the hot Dutch oven and carefully transfer the dough (with parchment) into it. Using a sharp razor blade or lame, score the dough ½-inch deep in a crosshatch pattern—this controls expansion and creates that beautiful rustic crust.
Bake covered for 20 minutes, then remove the lid and bake uncovered for an additional 20-25 minutes until the crust is deep golden brown and sounds hollow when tapped on the bottom. The internal temperature should reach 205-210°F. Let the bread cool on a wire rack for at least 1 hour before slicing—this allows the crumb to set properly and prevents a gummy texture.
Pro Tips For Making Artisan Country Bread
- STRETCH AND FOLD: Use a bench scraper to fold your dough—it’s faster than hands and gives you that tight gluten structure without overworking it. I used to fight with my dough, but this makes it feel like a workout for the gluten, not your arms.
- WEIGH YOUR FLOUR: Skip the scooping—use a kitchen scale for both all-purpose and bread flour. That extra 10 grams of flour you eyeball can make your dough dry and dense, and no one wants a brick for dinner.
- LET IT RISE COLD: If your kitchen’s warm, slow the bulk fermentation by moving the dough to the fridge after the first 2 hours. It develops flavor overnight and gives you a more manageable shape later—no more wrestling with a runaway loaf.
- STEAM THE OVEN: Place a metal tray on the bottom rack and pour in 1 cup of boiling water right before baking. The steam mimics a bakery’s deck oven and guarantees that crispy, golden crust you’re after—no sad, pale loaves here.
Best sauces and condiments for this dish
Classic Butter Bath
There’s nothing quite like spreading cultured European-style butter (like Plugrá or Kerrygold) on freshly baked country bread. I melt 2 tablespoons of softened butter with 1 teaspoon honey and a pinch of flaky sea salt, then brush it over the warm crust.
The honey adds subtle sweetness that balances the bread’s rustic richness, while the salt enhances every bite. For extra decadence, sprinkle with toasted sesame seeds or crushed black pepper. 🧈
Herbed Olive Oil
Infuse ½ cup extra-virgin olive oil with 2 tablespoons fresh rosemary, 1 tablespoon fresh thyme, and 3 minced garlic cloves by heating gently for 10 minutes in a saucepan. Strain and drizzle over slices while still warm.
This Mediterranean-inspired pairing elevates the bread’s natural flavors, especially when served with charcuterie or grilled vegetables. I love using California avocado oil for a lighter option that doesn’t overpower.
Spiced Honey Glaze
Combine ¼ cup honey with 1 teaspoon Dijon mustard, ½ teaspoon ground cinnamon, and a pinch of cayenne pepper in a small saucepan. Simmer for 3 minutes until slightly thickened, then brush onto the crust just before serving.
The warmth of the cinnamon and subtle heat from the cayenne create a perfect contrast to the bread’s crusty exterior. This glaze works especially well with warm apple slices or sharp cheddar cheese on the side.
Garlic Confit Spread
Slow-cook 6 garlic cloves in ¼ cup olive oil with 1 teaspoon smoked paprika and ½ teaspoon red pepper flakes at 275°F for 1 hour until golden. Mash the garlic into the oil and spread generously on toasted bread.
The deep, smoky flavor pairs beautifully with the bread’s open crumb. For extra richness, mix in 1 tablespoon crumbled feta cheese or whipped goat cheese. This spread is a game-changer for breakfast or as an appetizer with olives.
Whipped Ricotta
Whip ½ cup whole-milk ricotta with 1 tablespoon heavy cream, 1 tablespoon chopped fresh dill, and ½ teaspoon lemon zest until light and fluffy. Spread on toasted bread and top with sliced radishes or thinly sliced cucumber.
The tangy creaminess cuts through the bread’s crust while adding a refreshing contrast. I often serve this with smoked salmon or grilled chicken for a balanced meal. 🥗
Smoky Chipotle Aioli
Blend ½ cup mayonnaise with 1 chipotle pepper in adobo sauce, 1 teaspoon lime juice, and ½ teaspoon honey until smooth. Spread a generous layer on toasted bread and top with avocado slices or pickled red onions.
The smoky heat from the chipotle complements the bread’s crust perfectly, especially when paired with grilled shrimp or spicy tacos. For a lighter version, use Greek yogurt instead of mayo.
Nutrition facts
Frequently asked questions
Can I make this artisan country bread without a Dutch oven?
While a Dutch oven creates the perfect steam for a crispy crust, you can achieve great results with a baking stone or steel. Place it on the lowest oven rack and preheat for 30 minutes at 450°F. Score the dough and bake covered with foil for 20 minutes, then uncover for 15-20 minutes until golden. For extra steam, spray the foil with water before covering. The crust may be slightly less dramatic but still delicious!
How do I know when my sourdough starter is ready for this recipe?
Your starter should be 100% hydration (equal parts flour and water by weight), bubbly, and have doubled in size within 4-6 hours after feeding. It should also pass the float test: drop a small spoonful in water—if it floats, it's active enough! Feed it 12 hours before using 1 part starter to 2 parts flour and 2 parts water (by weight) for best results. A strong starter makes all the difference in flavor and texture.
Why did my bread turn out dense instead of crusty and airy?
Dense bread usually means underproofed dough or insufficient gluten development. Check these key steps: 1) Knead for at least 8-10 minutes—this builds structure. 2) Perform all three stretch-and-folds during bulk fermentation. 3) Proof until the dough springs back slowly when poked (not immediately). If your kitchen is cold (below 70°F), extend proofing time by 1-2 hours. Also ensure your oven is fully preheated before baking.
Can I substitute bread flour with all-purpose flour?
Yes, but you'll need to adjust for texture. Replace the 2 cups bread flour with all-purpose flour and add 1 tablespoon vital wheat gluten per cup to mimic the protein content. This helps develop gluten for that signature open crumb. Alternatively, use 1 extra tablespoon water per cup of all-purpose flour to compensate for lower protein. The bread will still be delicious, just slightly less airy.
How long can I keep the dough before baking?
The dough stays fresh for 24 hours in the fridge if covered tightly with plastic wrap. For best flavor, bake within 8 hours of mixing. If refrigerating, let it come to room temperature for 1-2 hours before shaping and proofing—this helps it rise properly. For longer storage, shape the dough, wrap in plastic, and freeze for up to 3 months. Thaw overnight in the fridge before baking.